Welcome into our studios for the the Back To School Blog Hop, hosted by Sam of Hunter’s Design Studio.
English paper-piecing can seem intimidating if you’ve never tried it before. Have you ever looked in awe at a beautiful Grandmother’s Flower Garden quilt and silently said, “There’s no way I could ever do a fussy little project like that!” This post will demonstrate how easy it is to start sewing your first English paper-piecing project!
In English paper-piecing, a small piece of fabric is folded around the edges of a geometric paper shape and basted securely in place. Once a number of these basted pieces have been created they are sewn, right sides together, using a simple whip stitch. You bend and crease both the paper and the fabric as you go, ensuring a tight seam no matter the angle. Afterwards, the paper inserts are removed and top can be finished with quilting and binding, or appliquéd onto a piece of whole cloth.
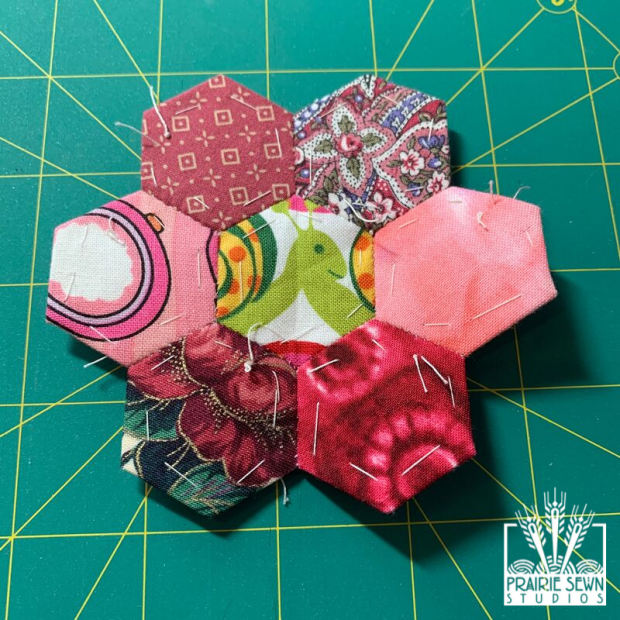
Our sample project today will be a traditional hexagon flower from a Grandmother’s Flower Garden. It’s the best and easiest shape for beginning English paper-piecing.
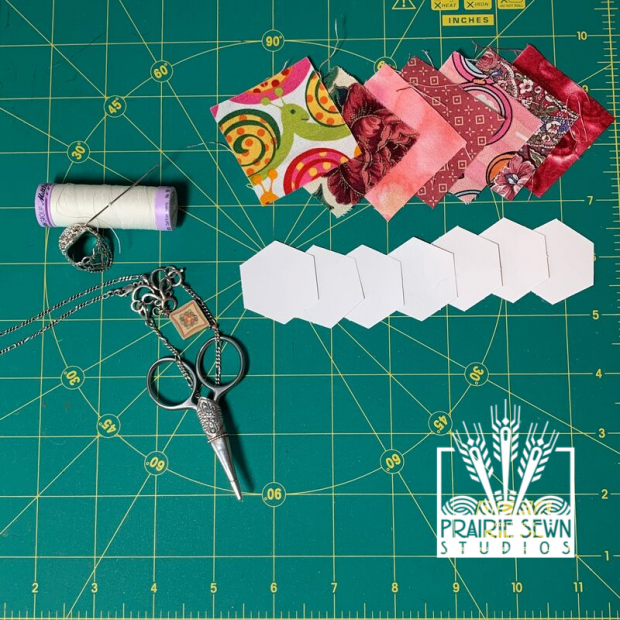
Tools Needed
Paper Inserts
The paper inserts are made with a slightly stiff paper that isn’t too thick. You can either purchase pre-cut papers or punch shapes using a crafting punch and cardstock. I use inserts from Paper Pieces, typically bought in bulk.
Fabric
Any fabric will do, as long as it can be folded around the paper insert. Traditionally English paper-pieced quilts use quilting cotton, sometimes fussy cut to feature a specific motif on the fabric. Since you’re working with a very small surface space, smaller prints typically yield better fussy cut results.
You can either cut your fabric so that is about ¼” larger than the paper insert, matching the shape angles (hexagon on hexagon) or you can use a square that is slightly larger than your shape. For the ¾” hexagons that are my favorite shape and size I use a 2” square.
Needle and Thread
Regular sewing thread is all you need. I use Mettler Silk-Finish Cotton thread and a regular sewing needle. If you have trouble getting through the paper, try a slightly larger needle.
Thimble
You’ll be pushing a needle through the two layers of fabric and paper, so a thimble is critical to protect your fingers. If you haven’t worn a thimble before, experiment with different kinds and materials to see which one works best for you. I use a metal thimble from TJ Lane.
Snipping Scissors
You’ll want your scissors to be fairly short and very sharp so that it’s easy to snip the threads in tight spaces as your project grows.
The Process
Step 1
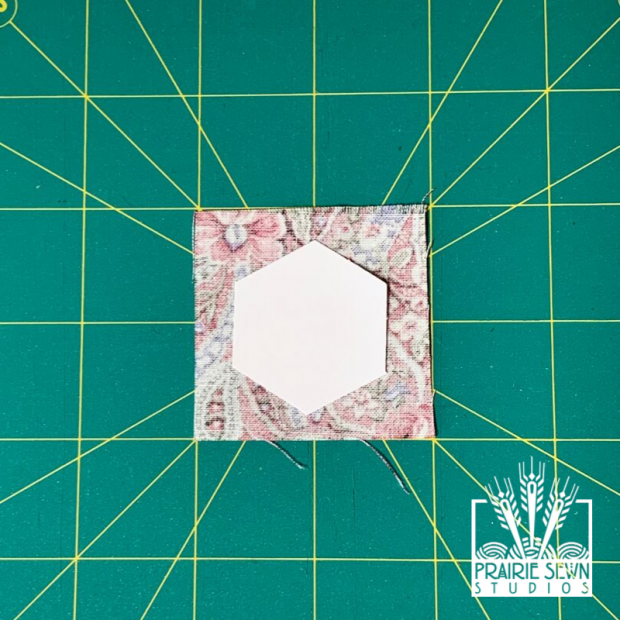
With the fabric face down, center the paper piece in the middle of the fabric. The insert will be sitting on top of the wrong-side of the fabric.
Step 2
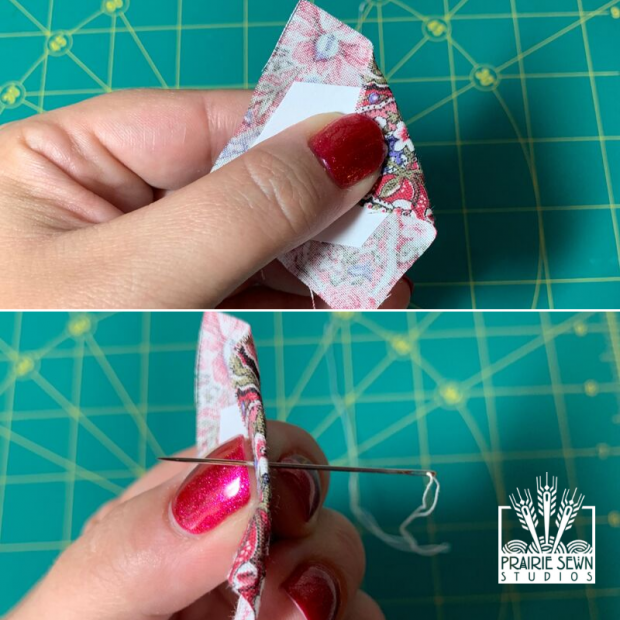
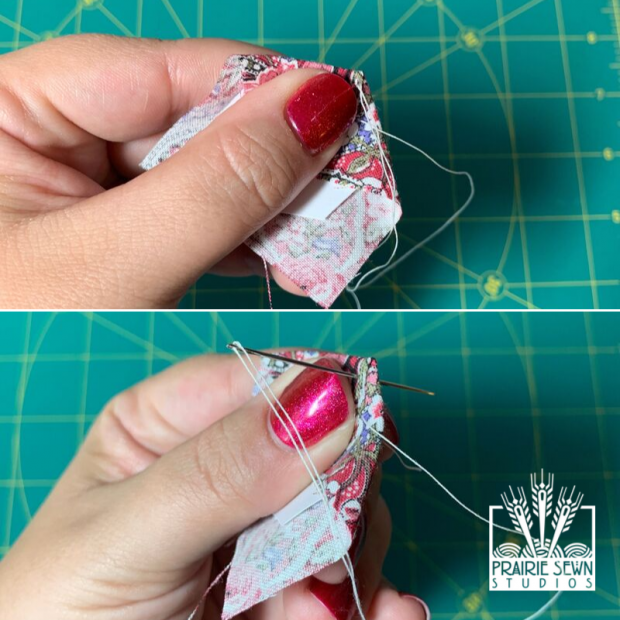
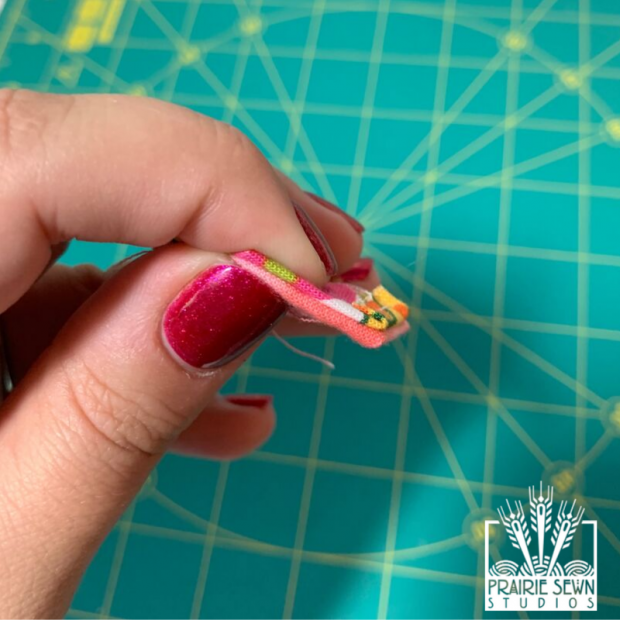
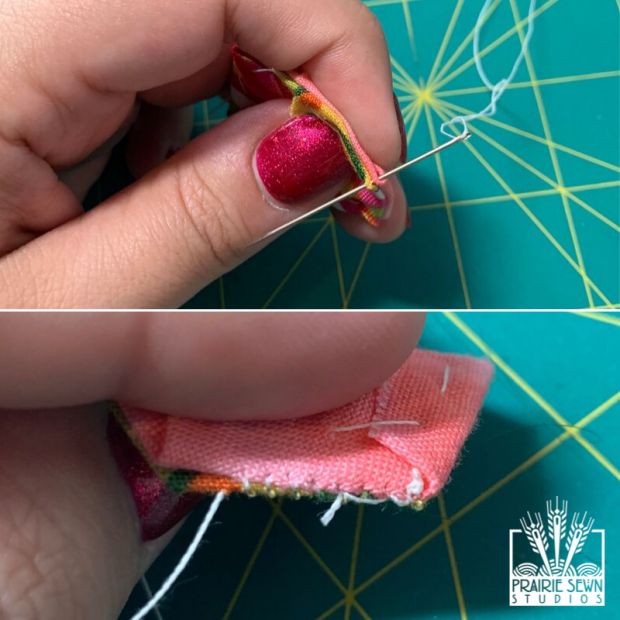
Hold both the fabric and the paper between your thumb and forefinger. Using the thumb and forefinger of the other hand, fold the fabric over the back of the paper insert, creasing it along the edge. Using the threaded needle, pull the needle through the paper insert. The knot should land on the fabric side of the unit, about ⅛” in from the edge.
Step 3
Going counterclockwise (for righties) fold and crease the fabric down over the next angle. Take your next stitch with the needle away from you, going through the two layers of fabric, right on the corner of the angle.
Step 4
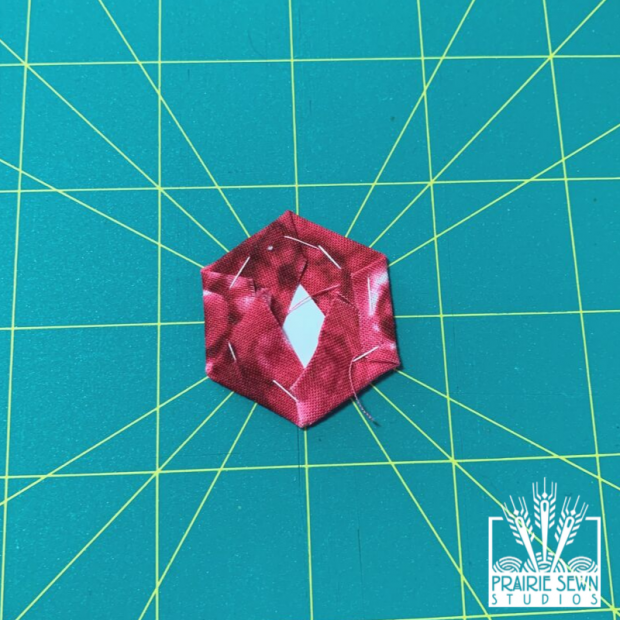
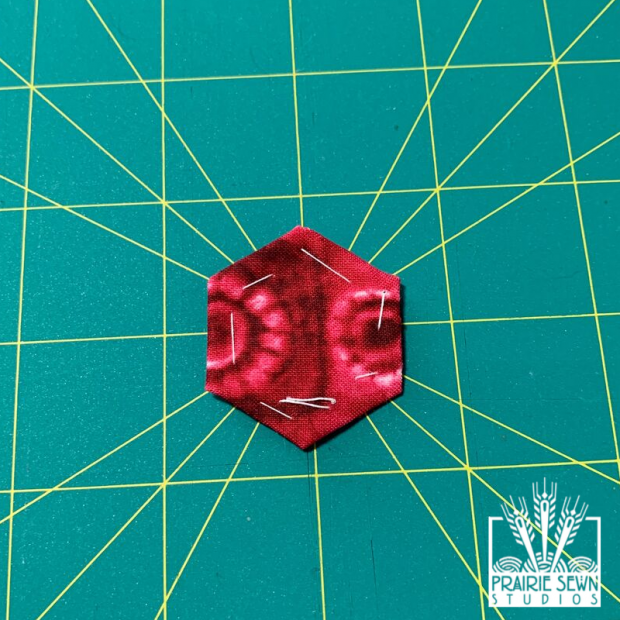
Continue around the shape until all sides have been covered by the fabric. Each angled corner should be tightly basted through the folded fabric and the paper insert.
Step 5
Take a few extra stitches at the end to secure the thread as you continue to handle the piece through the construction process, but don’t knot the thread; you want to make it secure but still easy to remove the papers.
Step 6
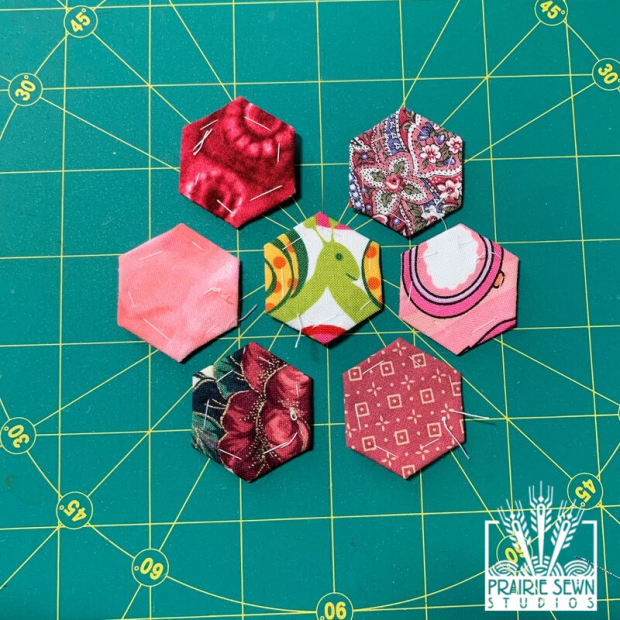
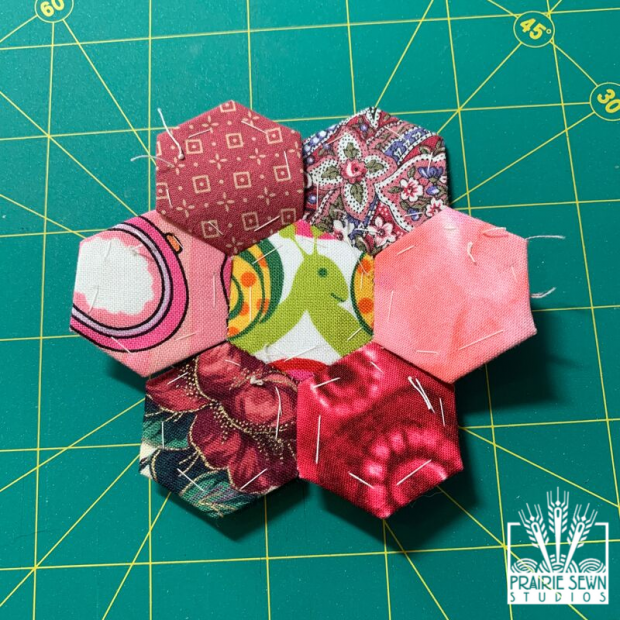
Repeat steps 1-5 until you have completed basting seven hexagons. Lay them out with one hexagon in the middle and the additional six surrounding it on each side.
Step 7
Place the first two pieces (the center piece and one side petal piece) with right sides together, and the straight edges lined up, angle to angle.
Step 8
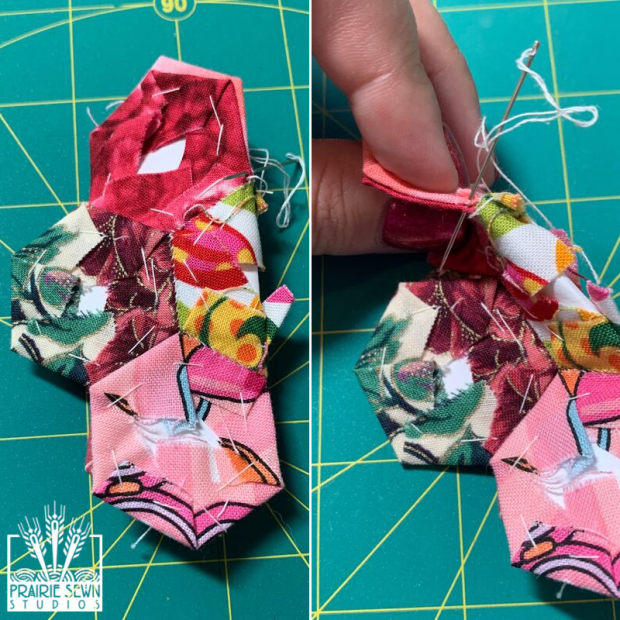
Going from right to left (again for us righties, lefties may find it easier to sew left to right), do a whip stitch from one end of the side to the other. The goal is to just catch the edges of the fabric pieces, and either completely avoid or just nick the paper insert. Keep your stitches close together and even. When you reach the other side, take a few extra stitched to secure the thread.
Step 9
Repeat steps 7 and 8 to add the additional petals around the center piece.
Step 10
Stitch the flower petals together. You will have to bend the paper and fabric pieces to get a tight seam on your angles, but it’s not a problem. Bend and fold as much as needed in order to match up the sides completely.
Congratulations on finishing your first English paper-pieced block! This technique can be quite addicting, so you might find yourself turning all of your scraps into hexagons (or other shapes)!
Where to get inspiration and ideas for English paper-piecing?
- Contain It! English Paper-Pieced Style Accessories. (<– Shameless plug for our book!) A new twist on this traditional technique; use English paper-piecing techniques to create 3D bowls, vases and boxes that can be used in your home.
- Paper Pieces. This company is the creme of the crop for laser cut paper inserts. Sign up for their newsletter for paper-piecing ideas and sales on their paper inserts!
- You can also get a FREE sample pack from them!
- English Paper-Piecing on Pinterest. Find new ways to put your basted blocks together, and be inspired by other sewists.
Tips
- If you’re having trouble holding pieces together while whip stitching, use a mini-clip (like wonderclip) to keep everything in place.
- Want to be a fussy-cutting wonder human? Use an acrylic template with the seam allowance marked to get it exactly right.
- Having trouble with the basting? Try a different method, like stitching only the fabric, starch or glue.
Looking for some more fun reads? Check out the rest of the blogs on the Back to School Blog Hop!
Day 1 – September 1 – Sam Hunter: Sewing Long Seams Without Stretching – huntersdesignstudio.com
Day 2 – September 2 – Susan Arnold – Joining Binding the Easy Way – quiltfabrication.com
Day 3 – September 3 – Angie Wilson – Fussy cutting tips and techniques – www.gnomeangel.com
Day 4 – September 4 – Andi Stanfield – No-Mark HST: Let your machine be your guide – truebluequilts.com/blog/
Day 5 – September 5 – Bobbie Gentili – Say YES to Y-seams – geekybobbin.com
Day 6 – September 6 – Mel Beach – 5 Reasons to Say Woo Hoo! to School Glue – pieceloveandhappiness.blogspot.com
Day 7 – September 7 – Laura Piland – 7 Ways to Use a Laser on Your Sewing Machine – www.sliceofpiquilts.com
Day 8 – September 8 – Suzy Webster – How to solve loops in free motion quilting – www.websterquilt.com
Day 9 – September 9 – Tara Miller – Accurate Stitch-and-Flip Corners – quiltdistrict.com
Day 10 – September 10 – Latifah Saafir – Accurate Seams Using Masking Tape! – latifahsaafirstudios.com
Day 11 – September 11 – Sarah Ruiz – The Magic of Glue Basting – saroy.net
Day 12 – September 12 – Jen Shaffer – Ways to stop your ruler from slipping while cutting – patternsbyjen.blogspot.com
Day 13 – September 13 – Cheryl Sleboda – Basics of ruching (a vintage fabric manipulation technique) – muppin.com
Day 14 – September 14 – Raylee Bielenberg – Choosing quilting designs for your quilt – www.sunflowerstitcheries.com
Day 15 – September 15 – Jen Strauser – Accurate and Attractive Machine binding – dizzyquilter.com
Day 16 – September 16 – Jane Davidson – Matching points for all types of intersections – quiltjane.com
Day 17 – September 17 – Teresa Coates – Starch and starch alternatives – teresacoates.com
Day 18 – September 18 – Jen Frost – Benefits of spray basting – faithandfabricdesign.com
Day 19 – September 19 – Sandra Starley – Getting started with Hand Quilting – utahquiltappraiser.blogspot.com
Day 20 – September 20 – Karen Platt – Drunkard’s Path Made Easy – karenplatt.co.uk/blog/
Day 21 – September 21 – Kris Driessen – All Kinds of Square (in a Square) – scrapdash.com
Day 22 – September 22 – Sarah Goer – Planned Improv Piecing – sarahgoerquilts.com
Day 23 – September 23 – Kathy Bruckman – Organizing kits for on-the-go sewing – kathyskwiltsandmore.blogspot.com
Day 24 – September 24 – Cheryl Daines Brown – The Secret to Flat Quilt Tops: Borders – quilterchic.com
Day 25 – September 25 – Cherry Guidry – Pre-assembling fusible applique – cherryblossomsquilting.com
Day 26 – September 26 – Laura Chaney – Getting started with English Paper Piecing – prairiesewnstudios.com
Day 27 – September 27 – Ebony Love – Cutting Bias Strips from a Rectangle – lovebugstudios.com
Day 28 – September 28 – Tammy Silvers – Working with heavier weight threads in your machine – tamarinis.typepad.com
Day 29 – September 29 – Kathy Nutley – Create a perfect facing or frame with 90 degree angles – quiltingsbykathy.com
Day 30 – September 3 – Joanne Harris – Using Leaders and Enders – quiltsbyjoanne.blogspot.com


Leave a Reply