Written by Linda Chaney, mother and Laura Chaney, daughter
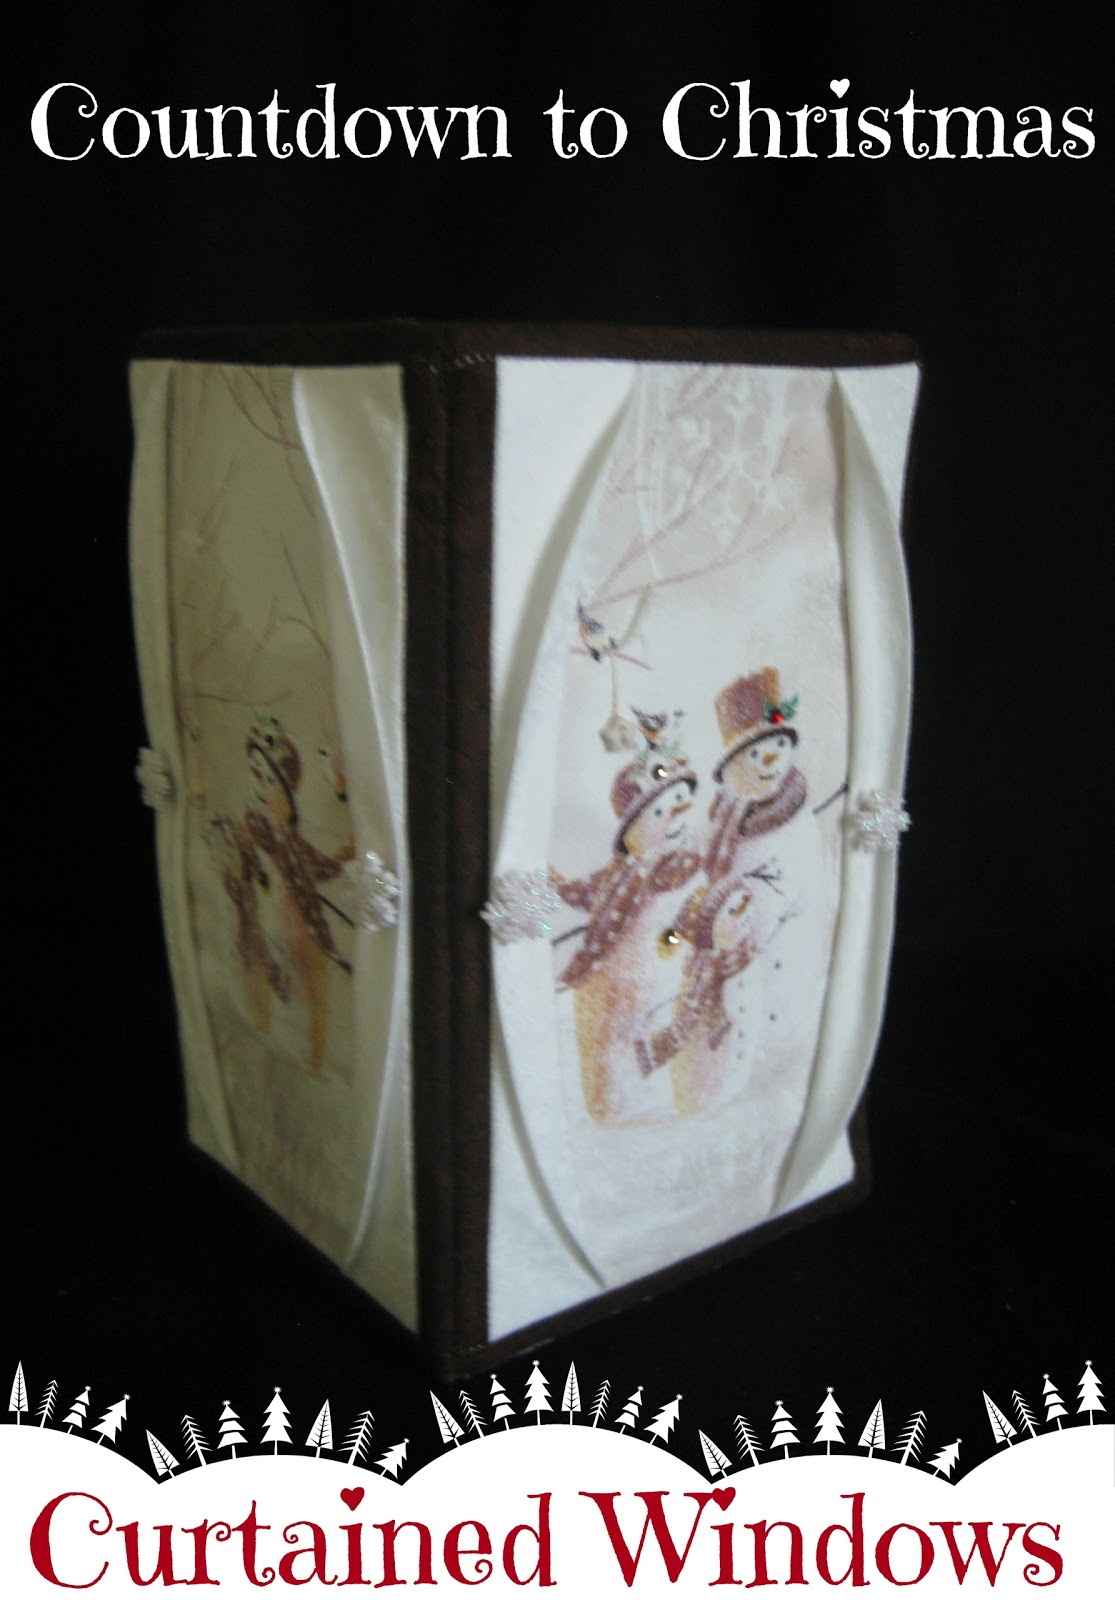
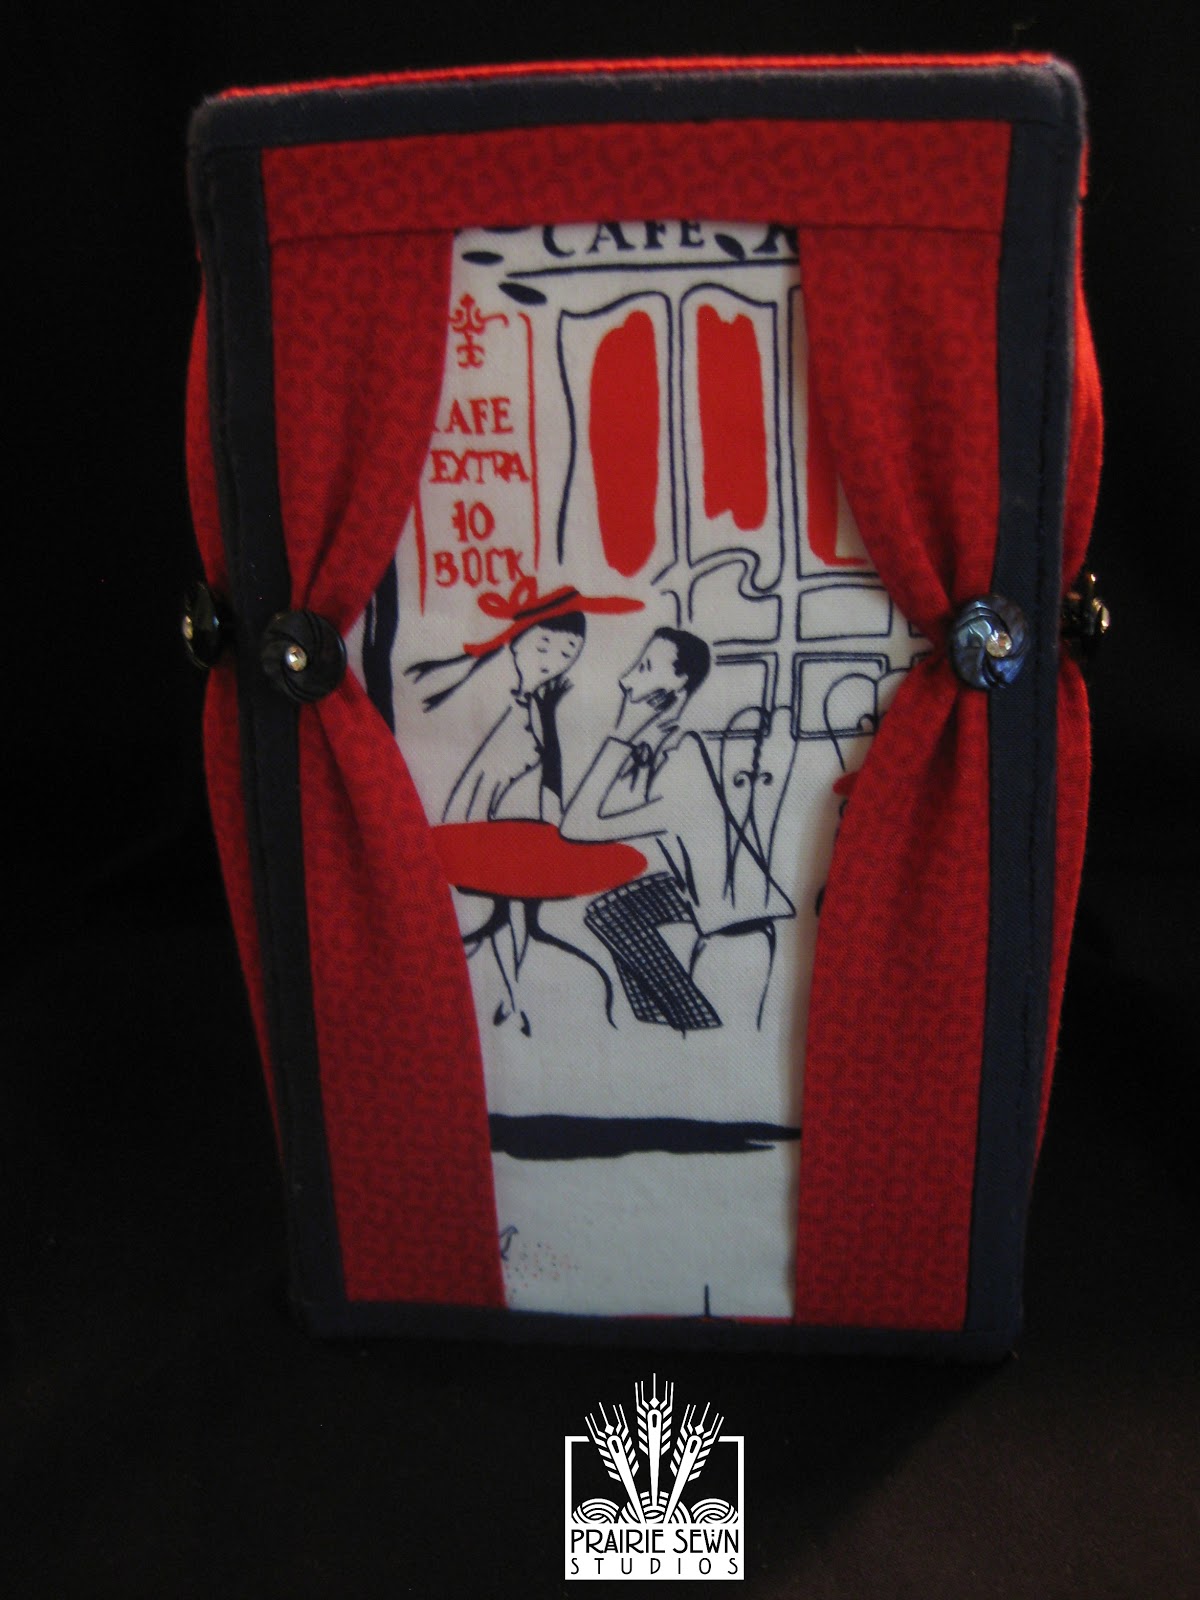
This week for Countdown to Christmas we are sharing a new technique to add a little something special to our regular vase pattern. Following the directions below, you’ll be able to make “curtained windows” on the sides of your vase. This works best with fabric that has a figure or a scene that you fussy cut to fit between the curtains on the sides of the vase.
Use a wide mouth/regular mouth quart canning jar inside of this vase to hold live flowers. You’ll need the book Contain It! English Paper-Pieced Style Accessories for some of the pattern pieces, and you’ll need to download and print the others (be sure the 2″ square measures correctly when you print the pattern pieces).
Pattern Pieces
- Template #82 – Inner Base
- Template #84 – Outer Base
- Template #131 – Inner Side
- Template #132 – Outer Side
- Template #133 – Curtain Fabric Template
Peltex – 22′ X 20″
- Cut 1 Inner Base – Template #82
- Cut 1 Outer Base – Template #84
- Cut 4 Inner Sides – Template #131
- Cut 4 Outer Sides – Template #132
Fabric – 4 fat quarters (one for Curtains; one for Outer Sides/Base; one for Inner Sides/Base; one for Window Frames)
Cut 1 Inner Base – Template #82
Cut 1 Outer Base – Template #84
Cut 4 Inner Sides – Template #131
Cut 4 Outer Sides, using Template #133 if making Curtained Windows
Directions:
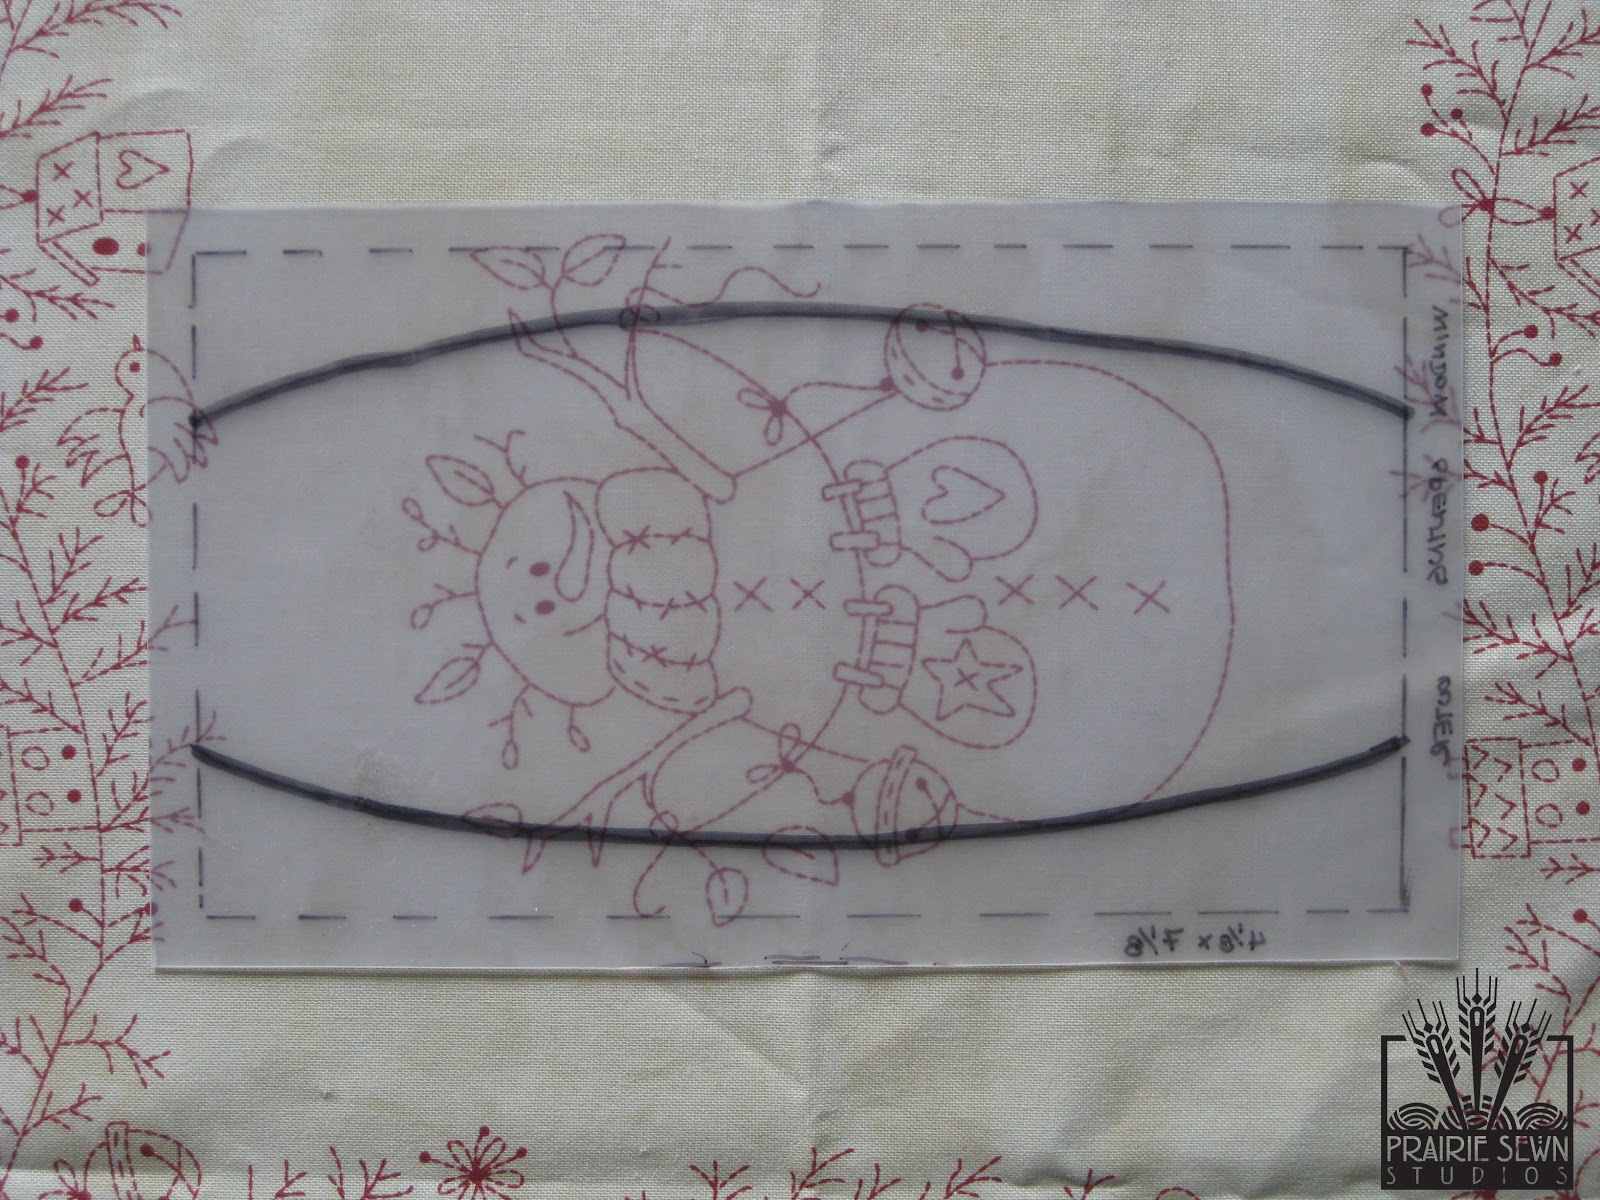
1. Use Template #133 to determine position of Fabric Scene within the window and cut out.
2. Cut 8 Curtains:
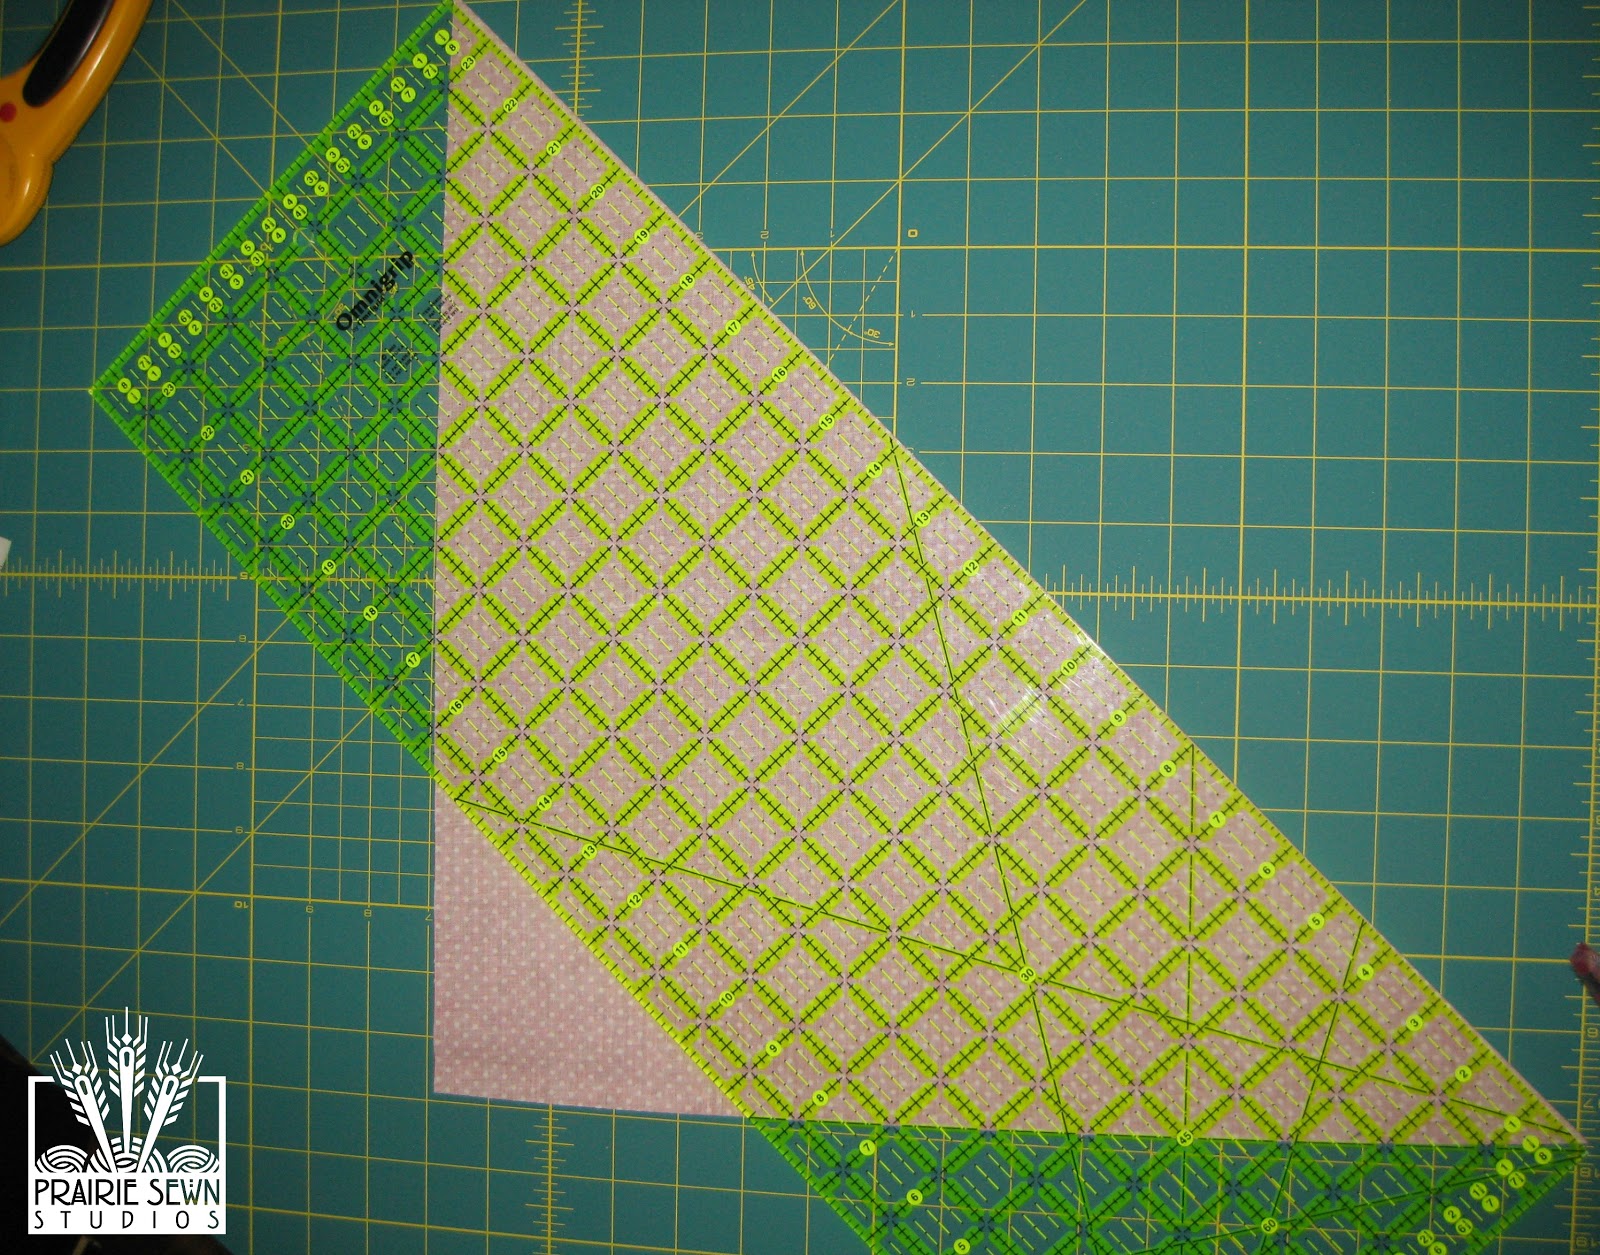
- Cut a 17″ x 17″ square; fold along diagonal and cut off fold(a very narrow strip).
- Cut 2 or 3 pieces- 2-1/2″ strips along bias edge.
- Subcut 2-1/2″ strips to measure 2-1/2″ x 7-1/8″. These strips will become the curtains.
- Cut Window Frames: 8 pieces at 1″ x 5-1/8″ and 8 pieces at 1″ x 7-1/8″
3. Creating the Curtained Window
- Lay Fabric Scene right side up; press.
- Fold 2-1/2″ x 7-1/8 Curtain Strip in half lengthwise, wrong sides together; GENTLY press. **Remember the fold is on a bias and will easily stretch!
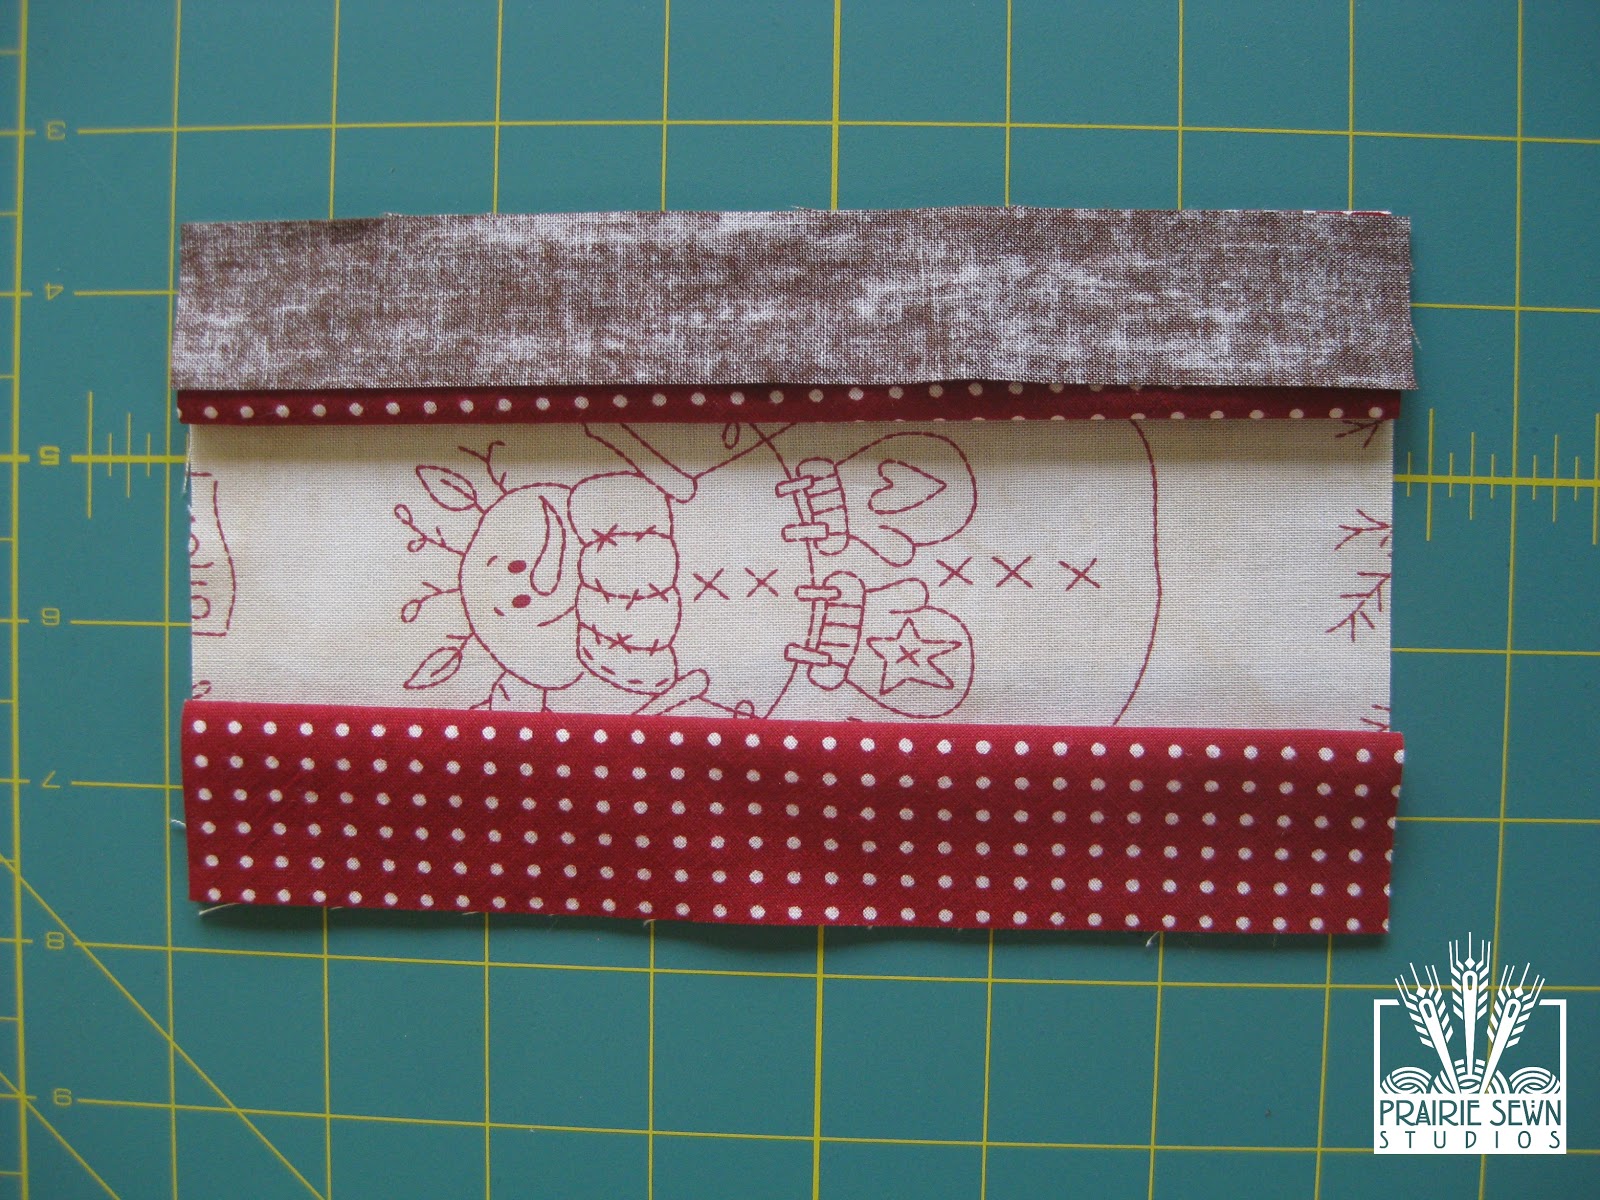
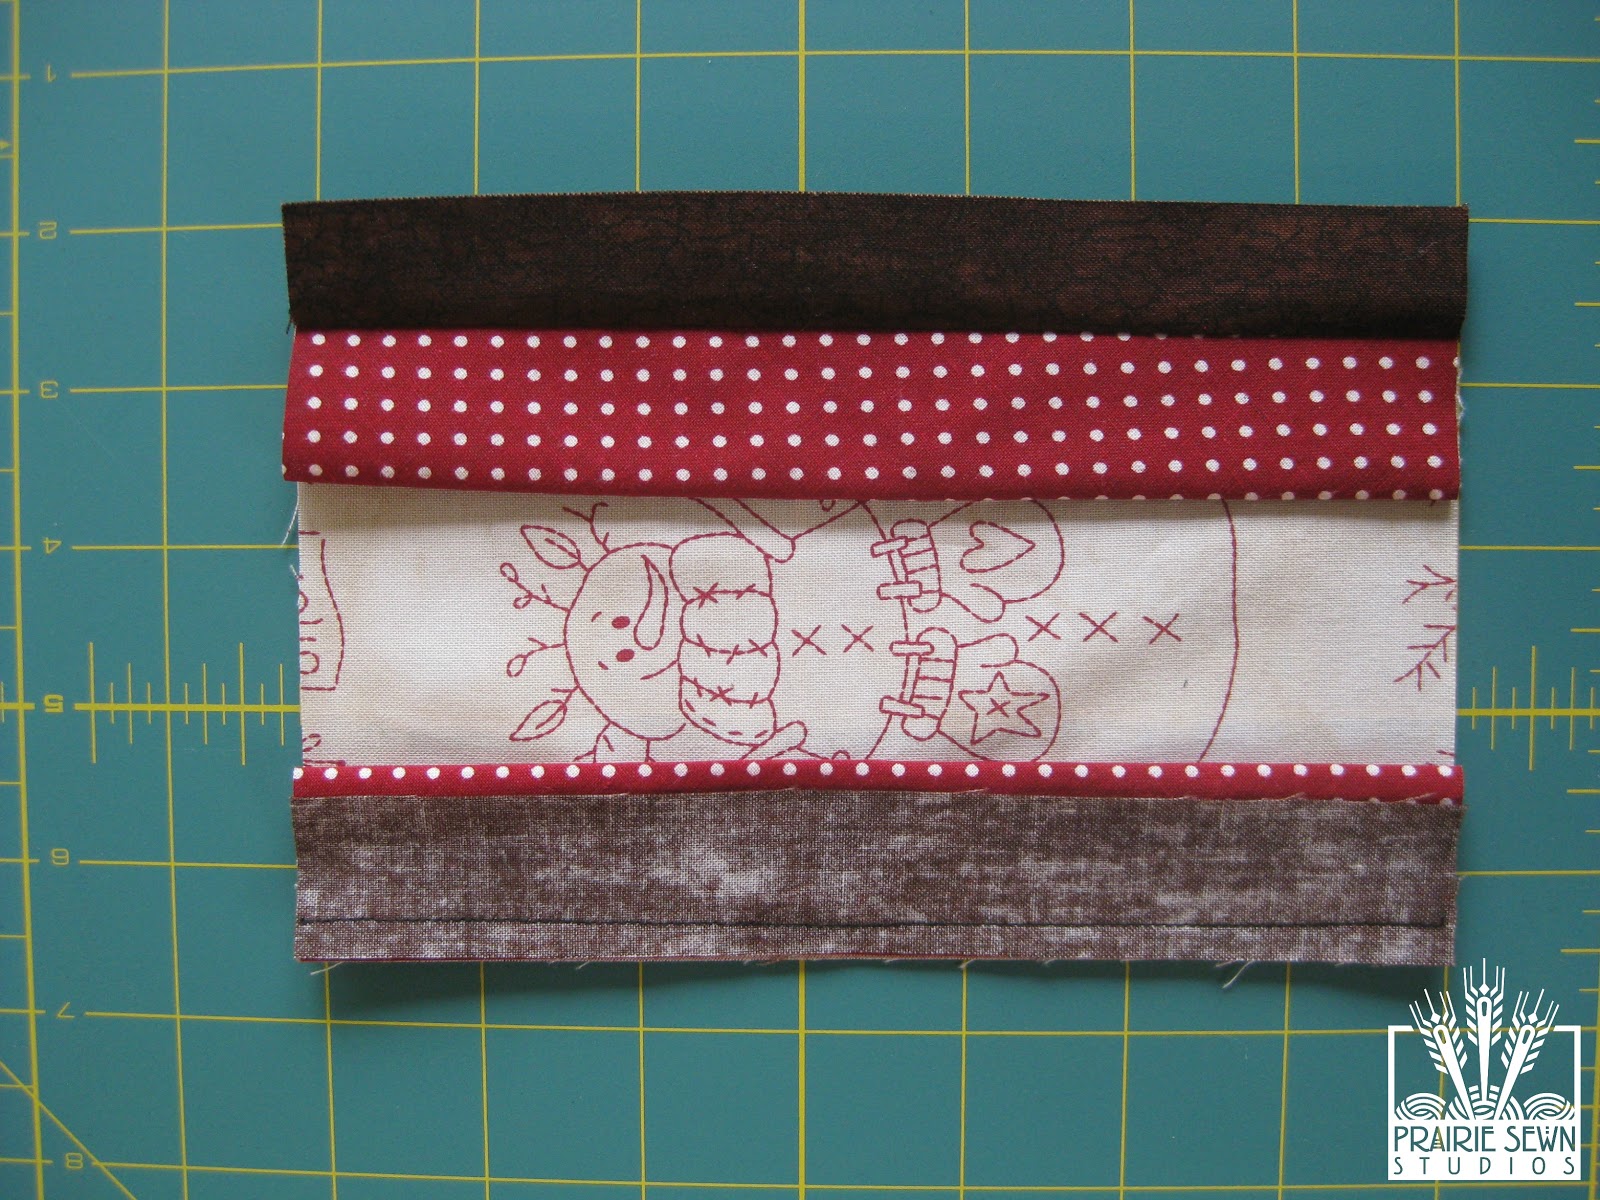
- Lay folded Curtain Strip on top of Fabric Scene with cut edges aligned along the left side of the Fabric Scene. The folded curtain edge should be towards the center of the scene.
- Lay 1″ x 7-1/8″ Window Frame on top of Curtain Strip, wrong side up, aligning cut edge of Window Frame Fabric along left side with cut edges of Scene and Curtain Fabrics. Hold in place.
- Sew 1/4″ along left side through all layers of fabric.
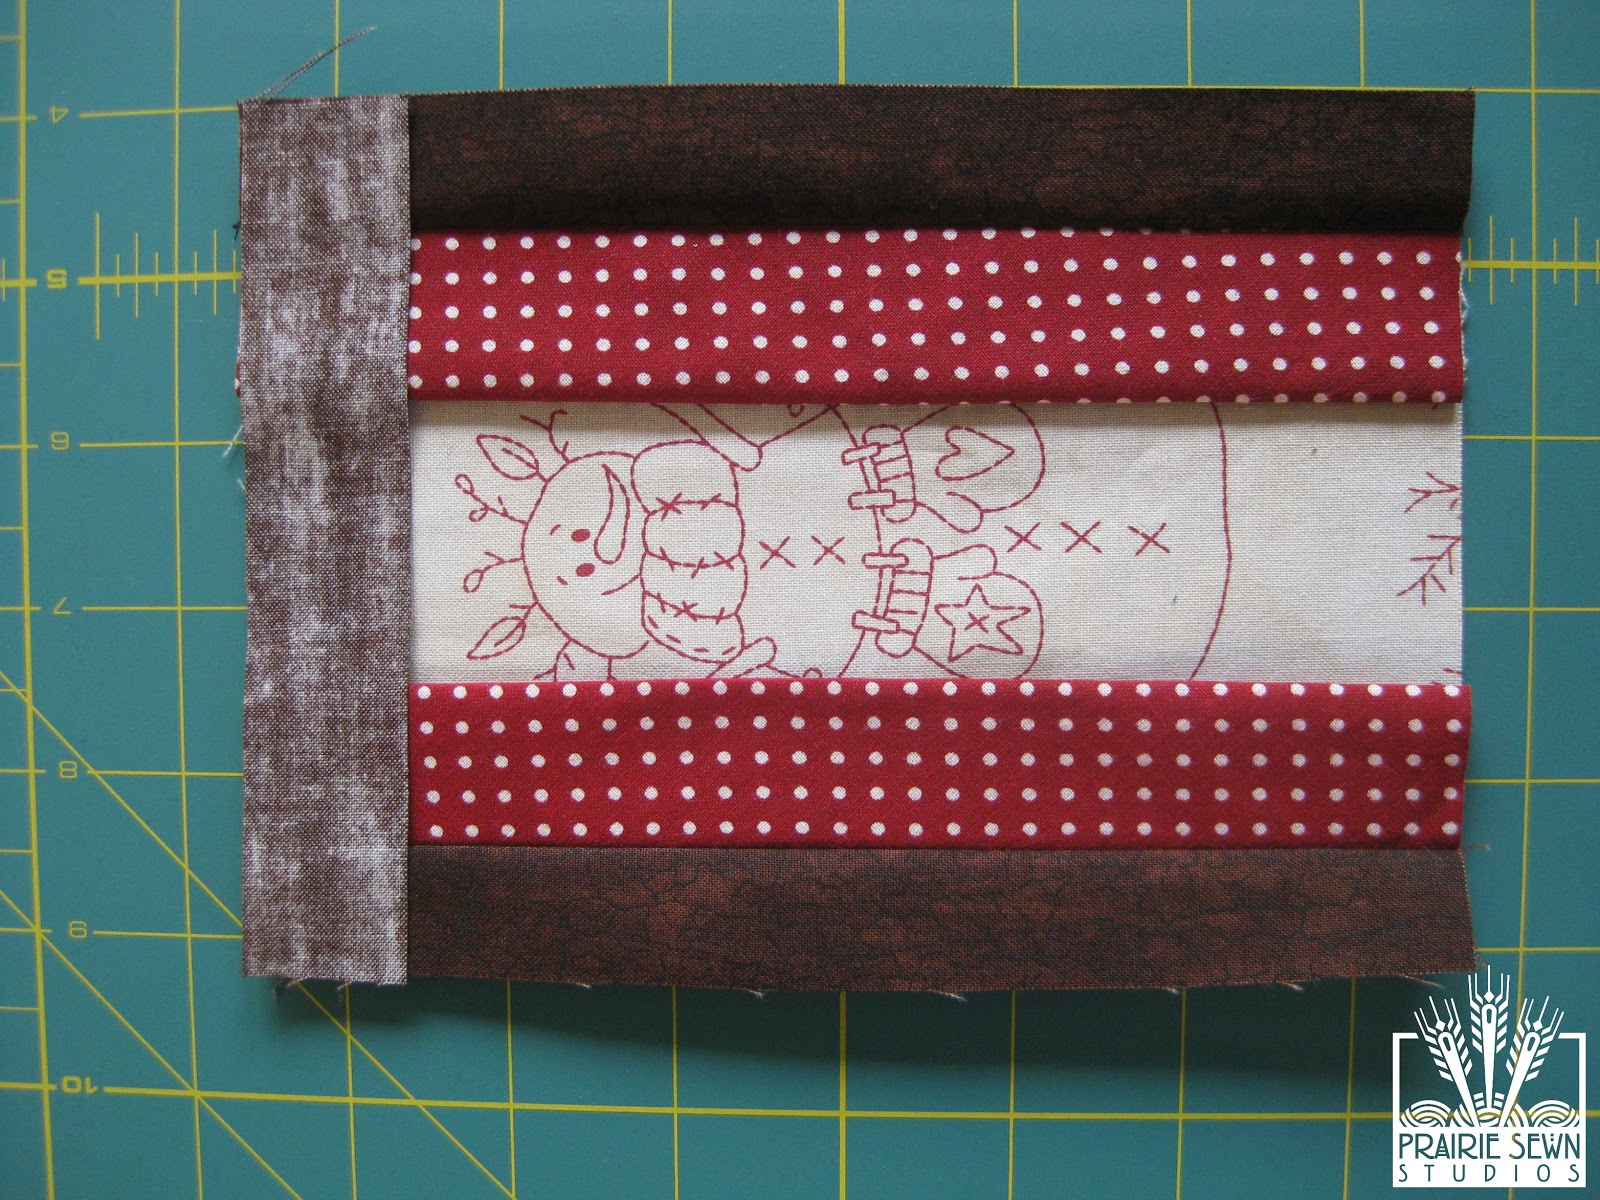
- Repeat above steps for the right side.
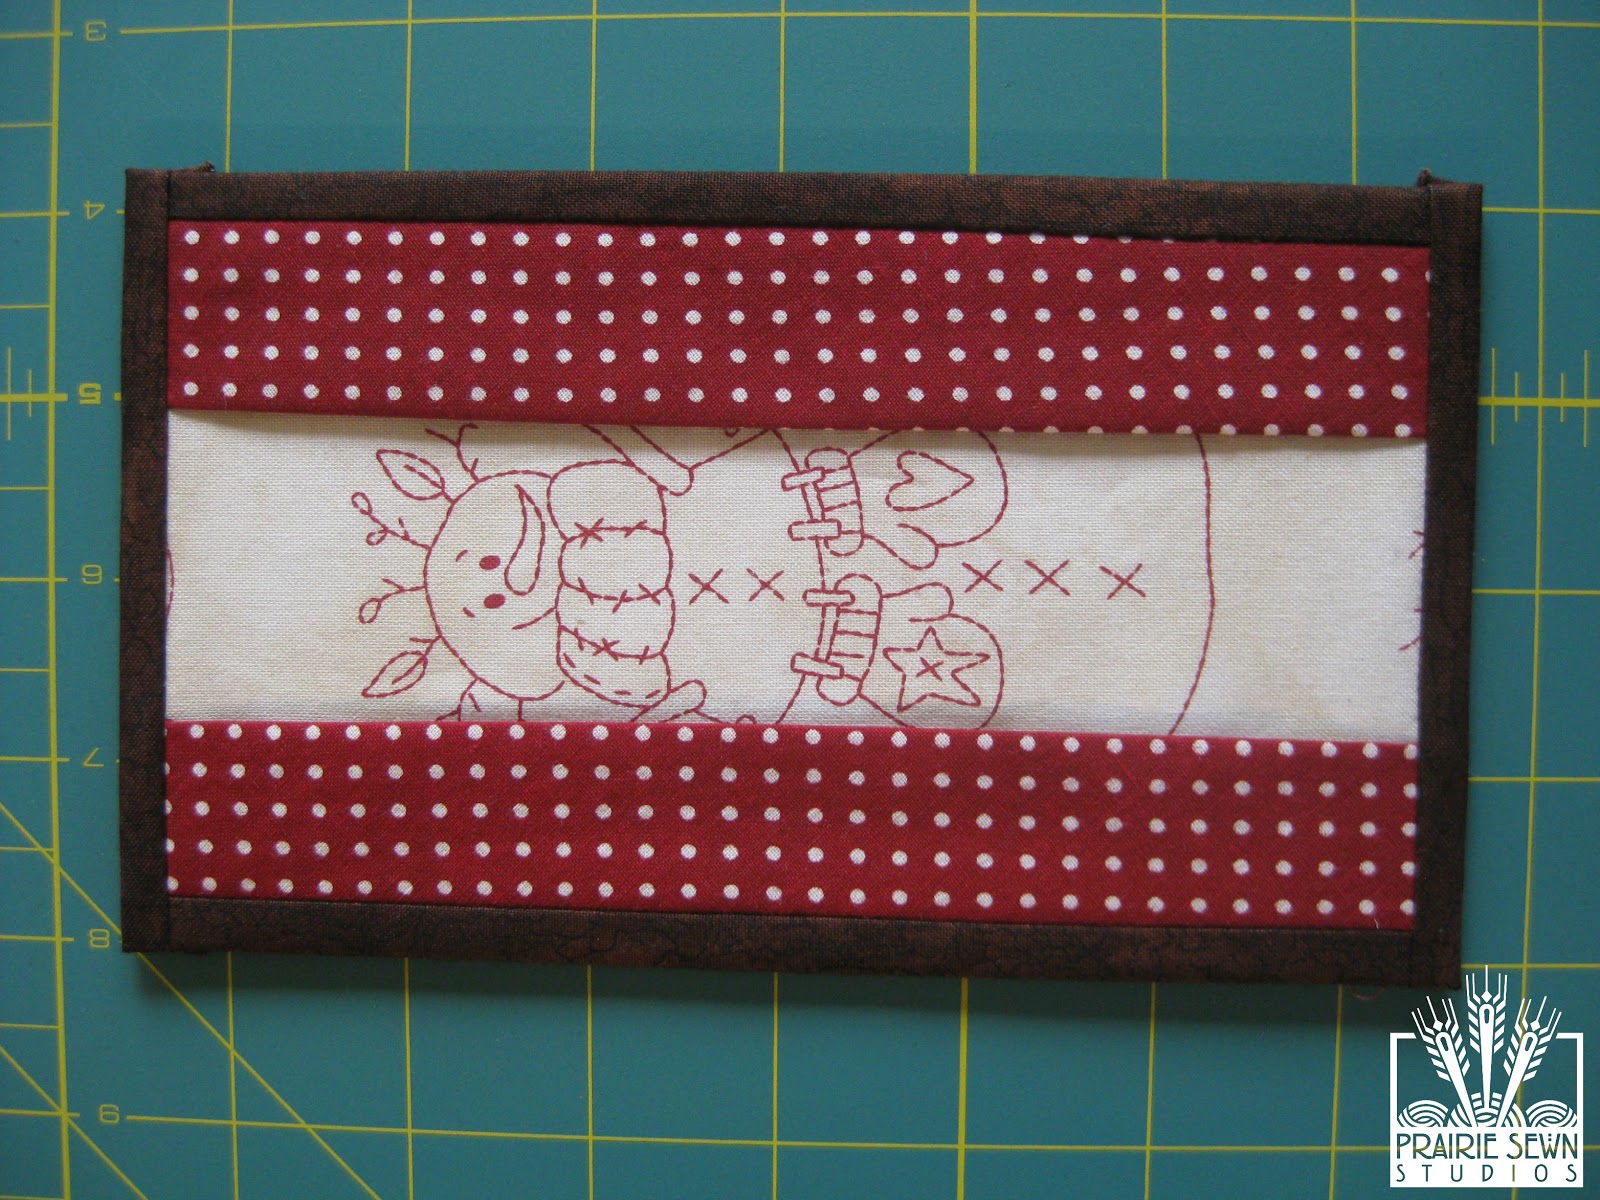
- Press Window Frame Fabric open on left and right sides.
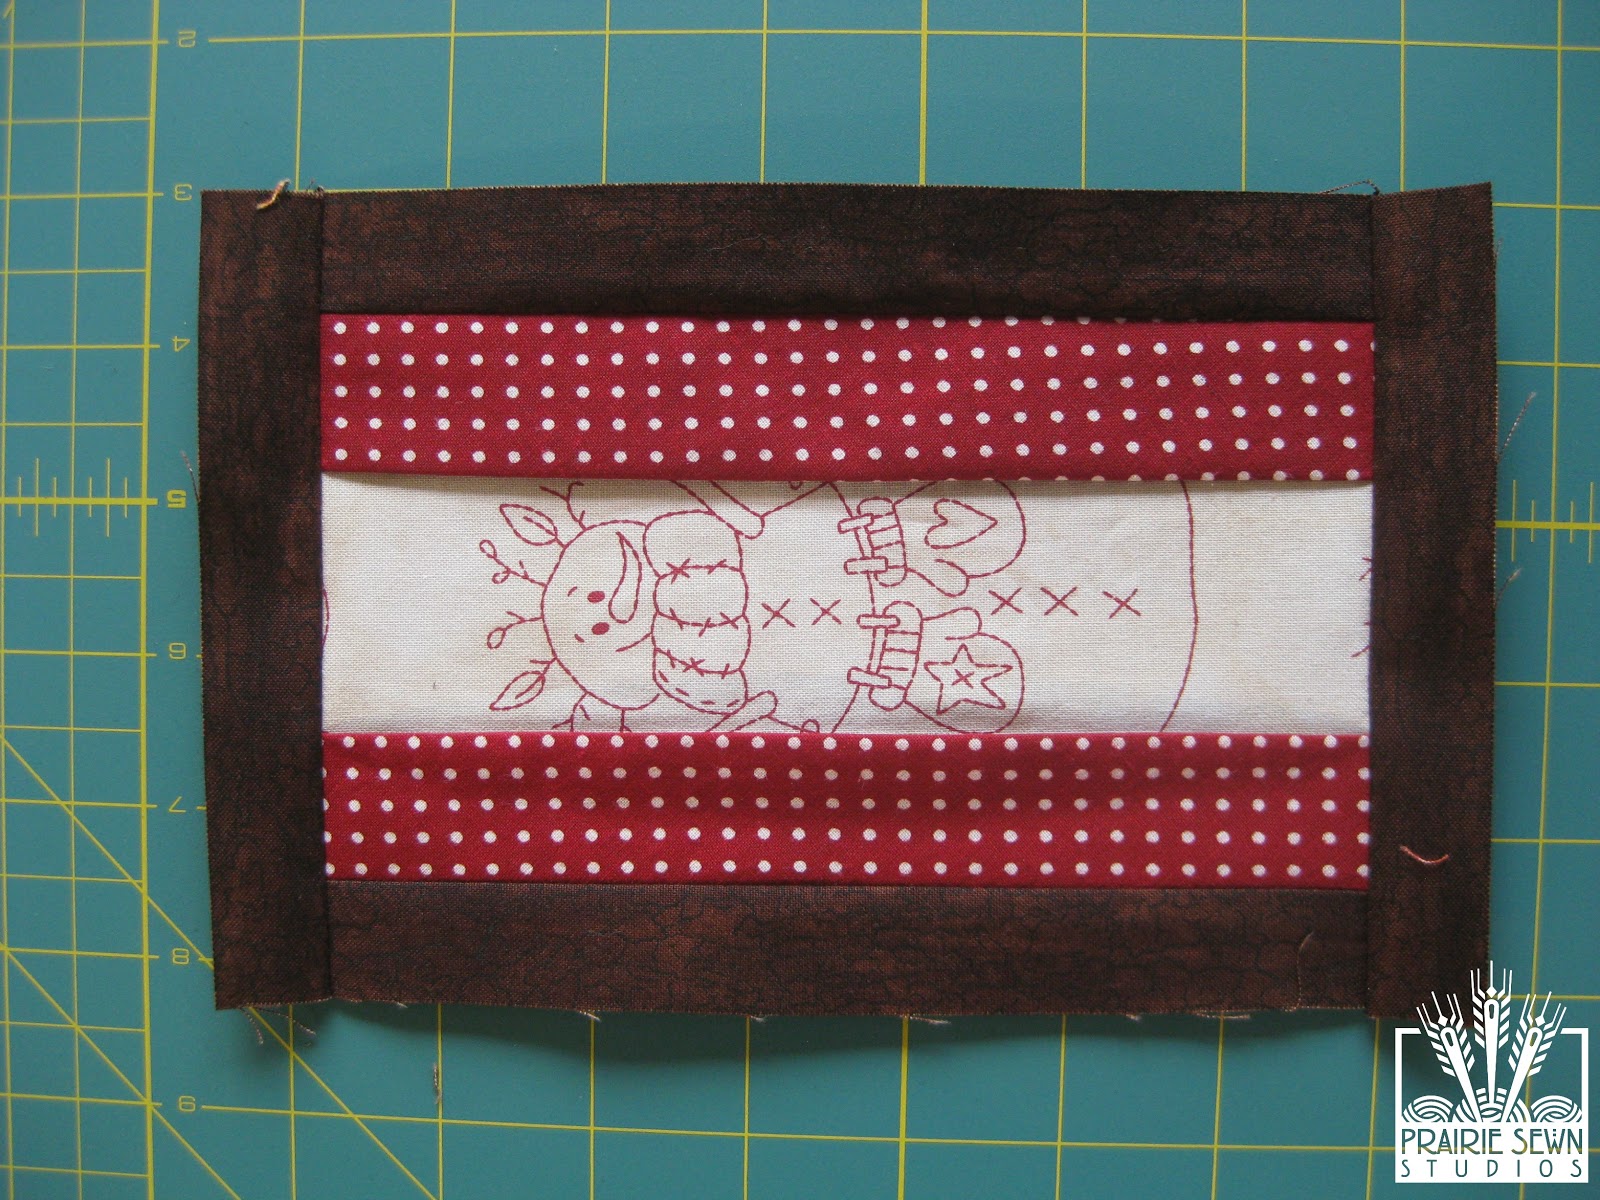
- Lay 1″ x 5-1/8″ Window Frame Fabric, wrong side up, along top edge of Curtained Scene Fabric. Sew 1/4″. Repeat along bottom edge.
- Press Window Frame Fabric open on top and bottom.
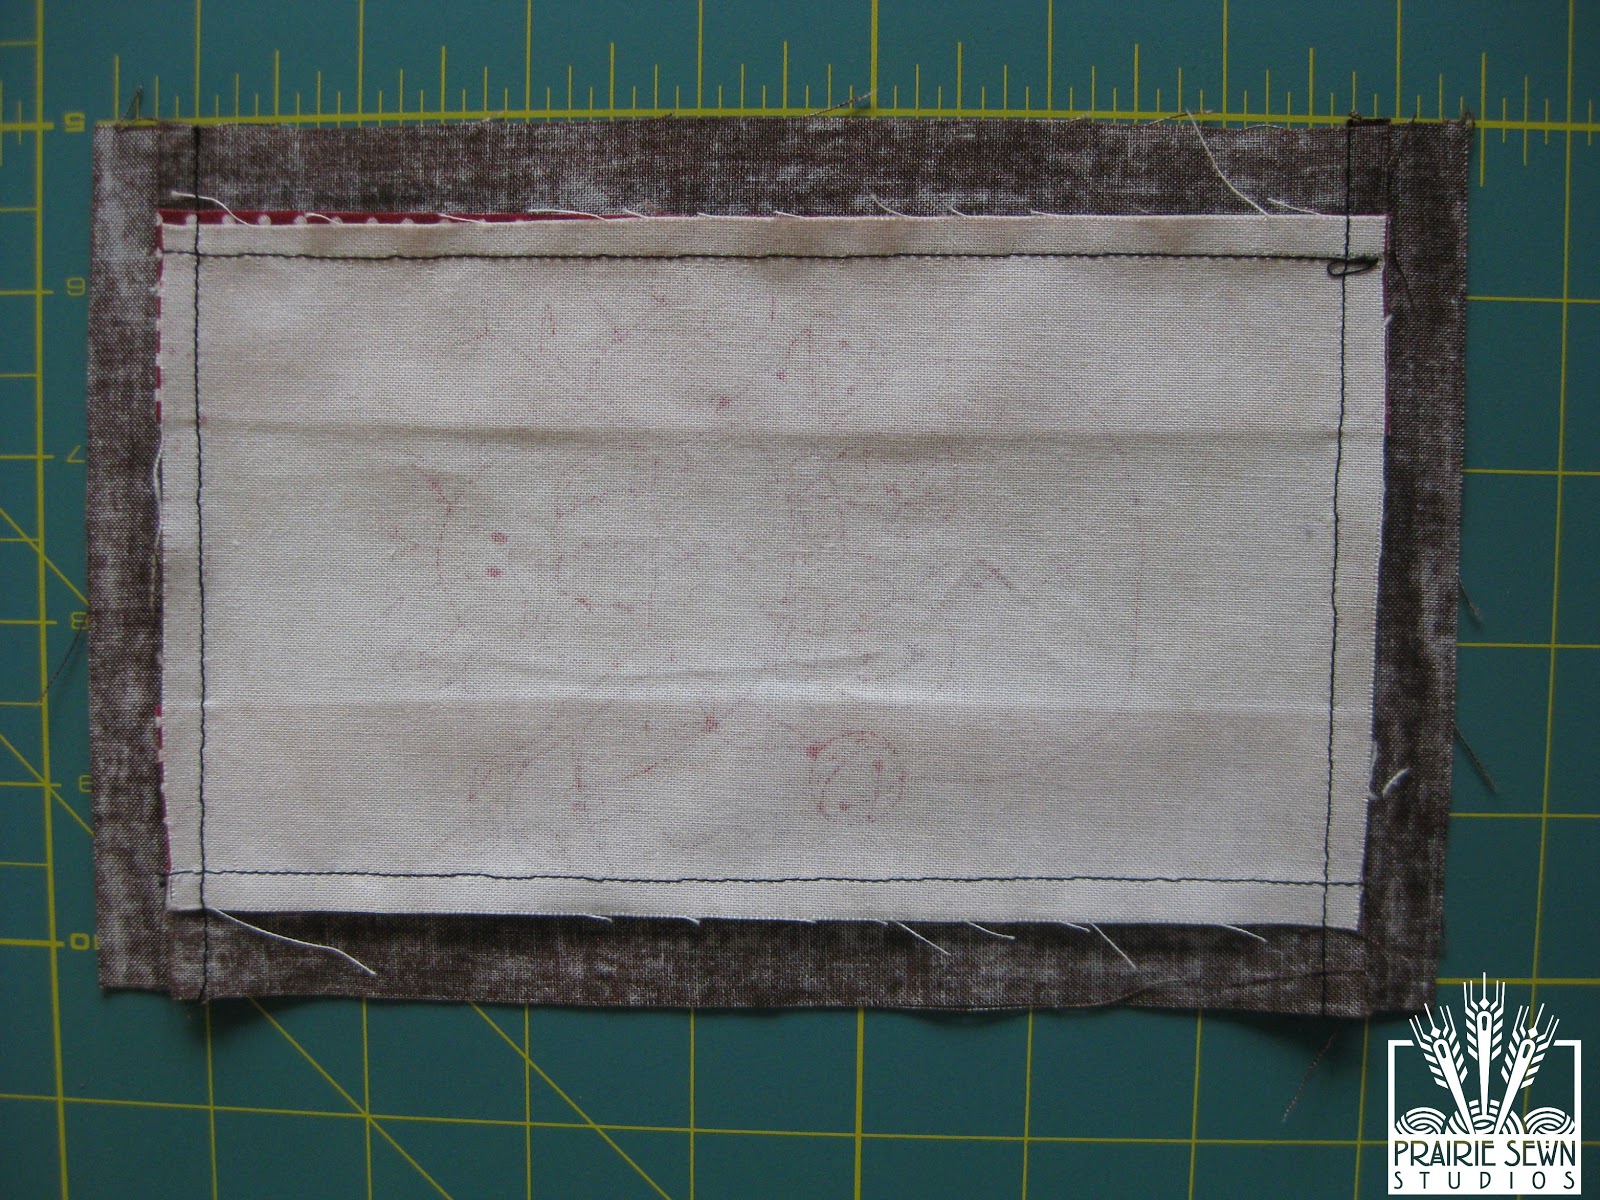
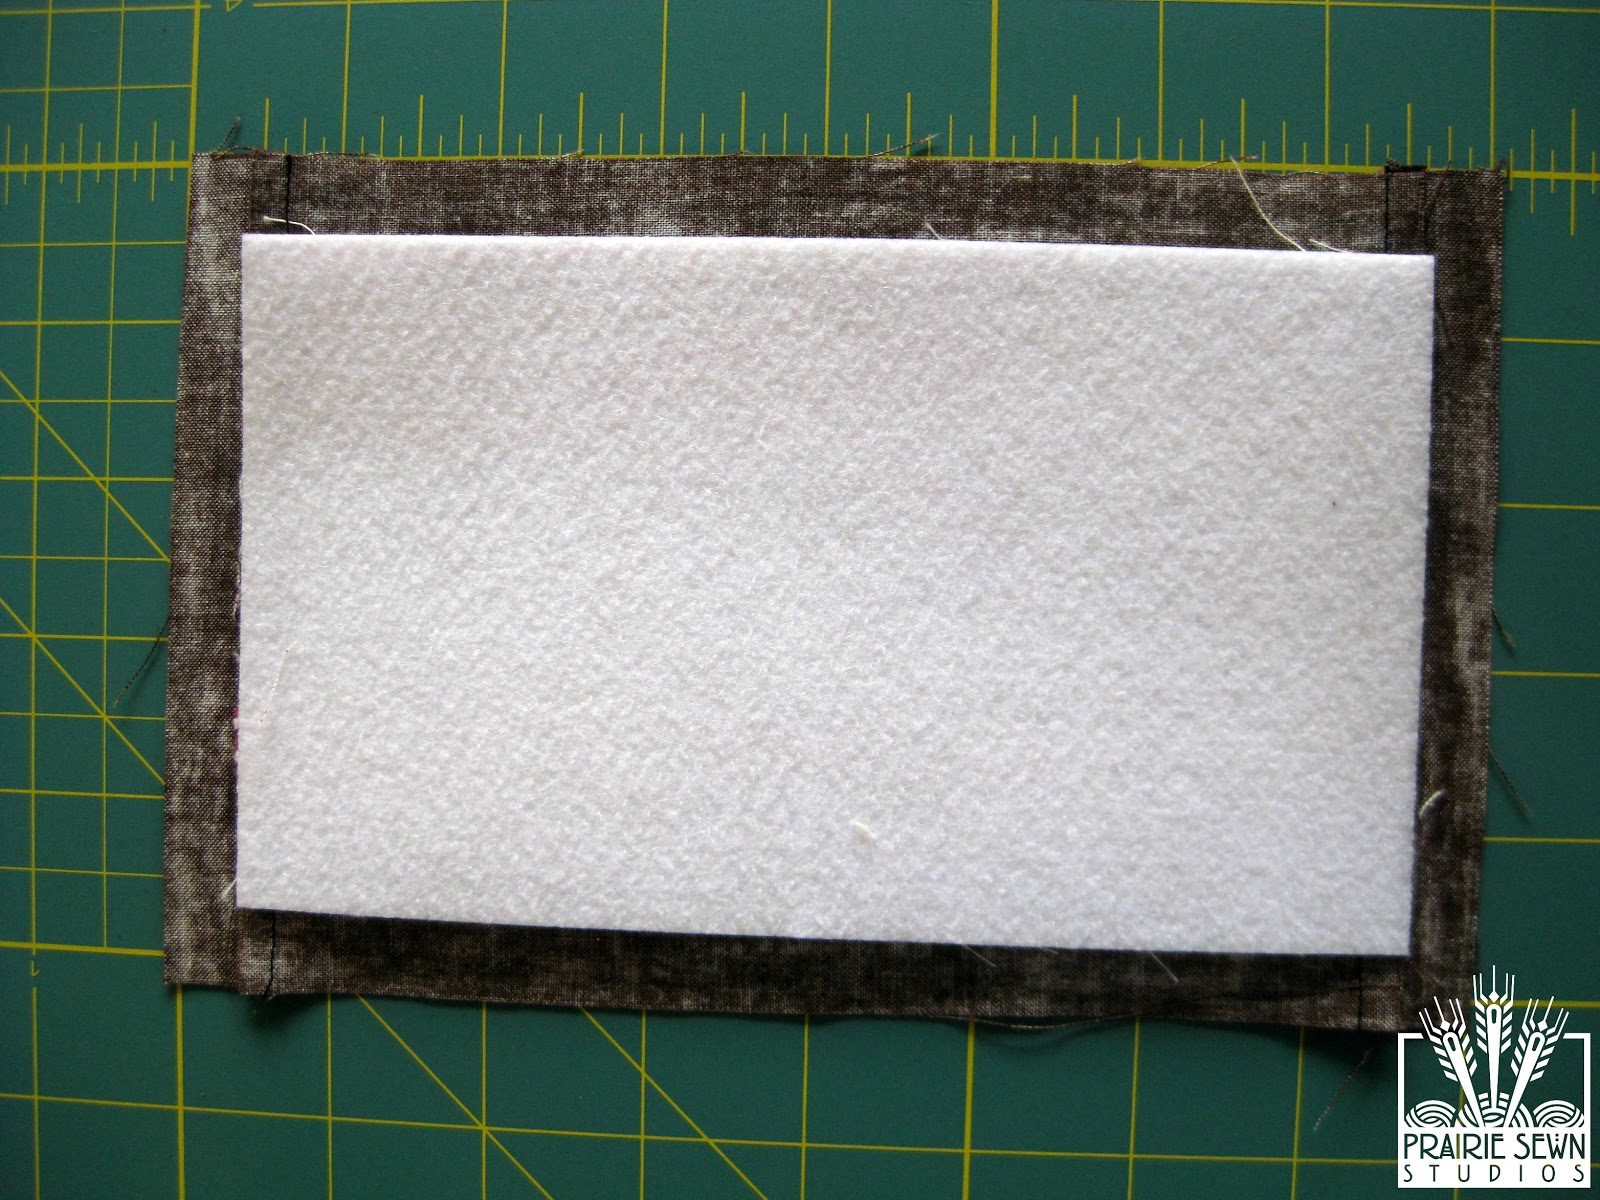
- Place Curtain Window Assembly wrong side up.
- Place Outer Side peltex on top of Curtain Window Assembly. The peltex should easily align with the sewn assembly. The Window Frame Fabric should extend ~ 1/2″ on all 4 sides.
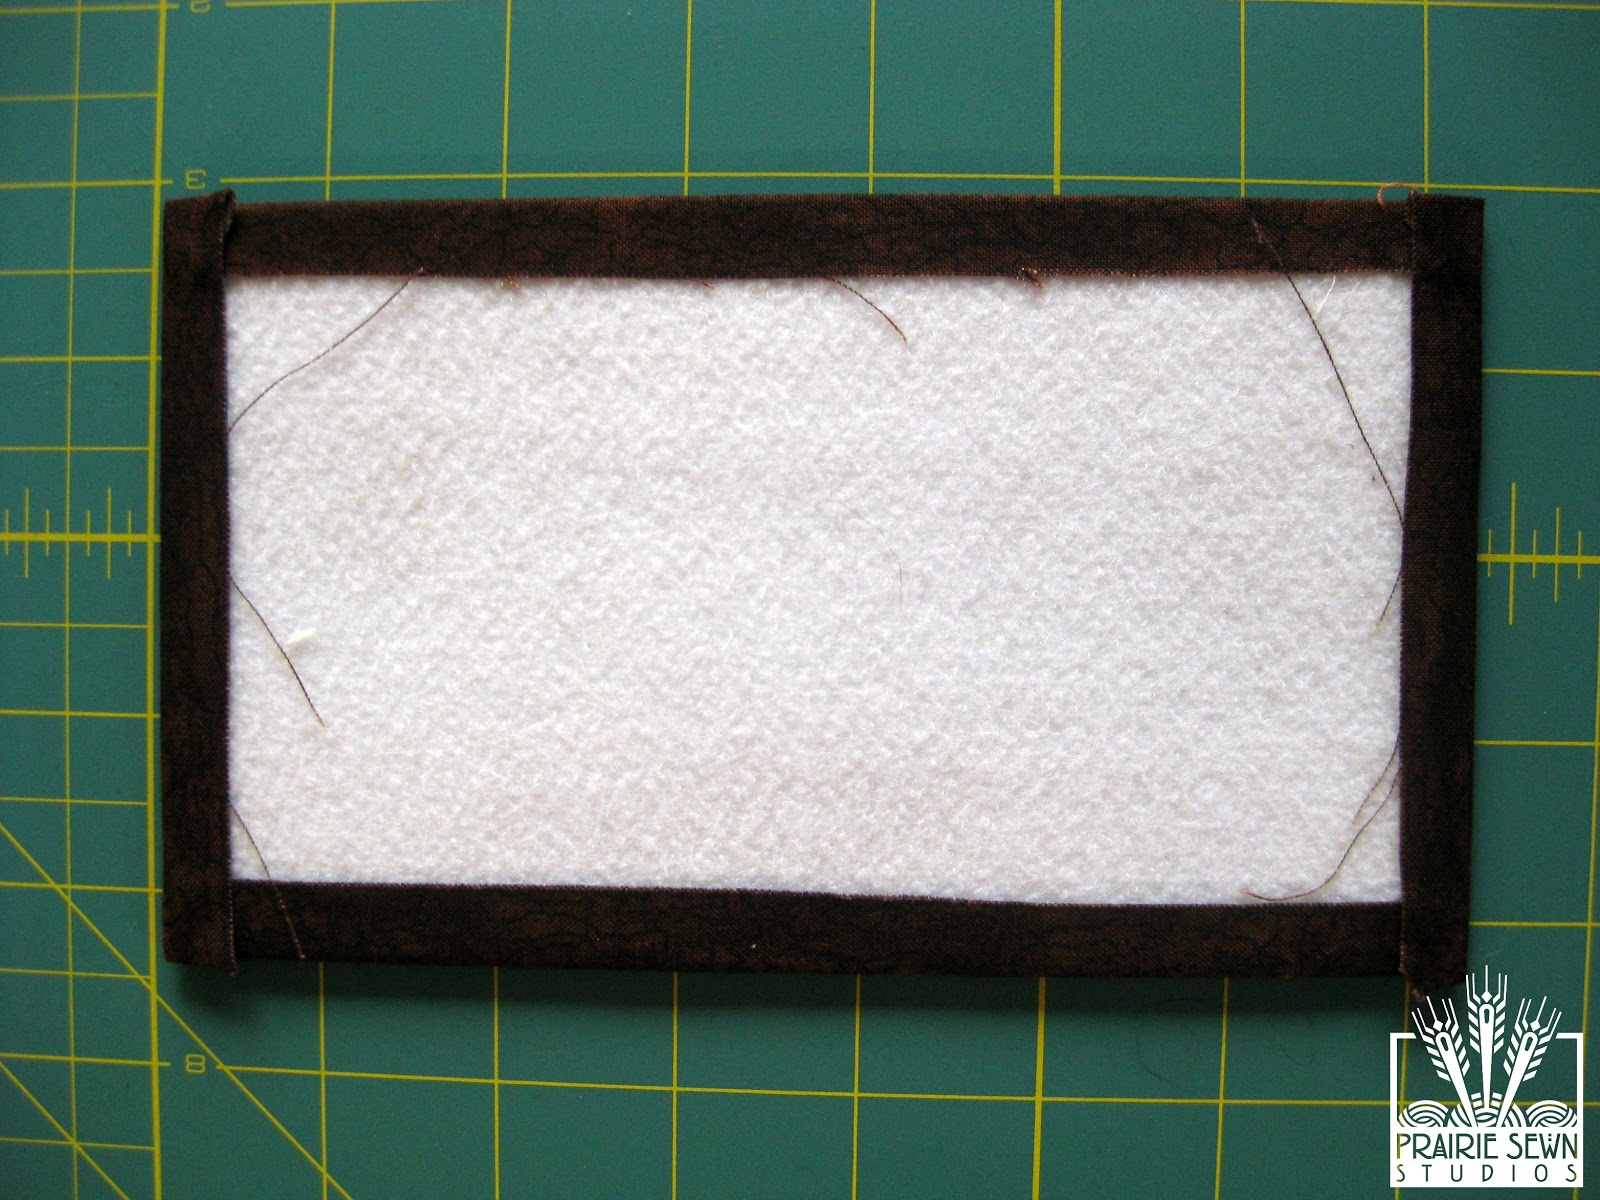
- Fuse Window Frame Fabric to peltex.
- Turn fused fabric/peltex piece right side up; gently press. The Window Frame should be ~1/4″ around all outer edges.
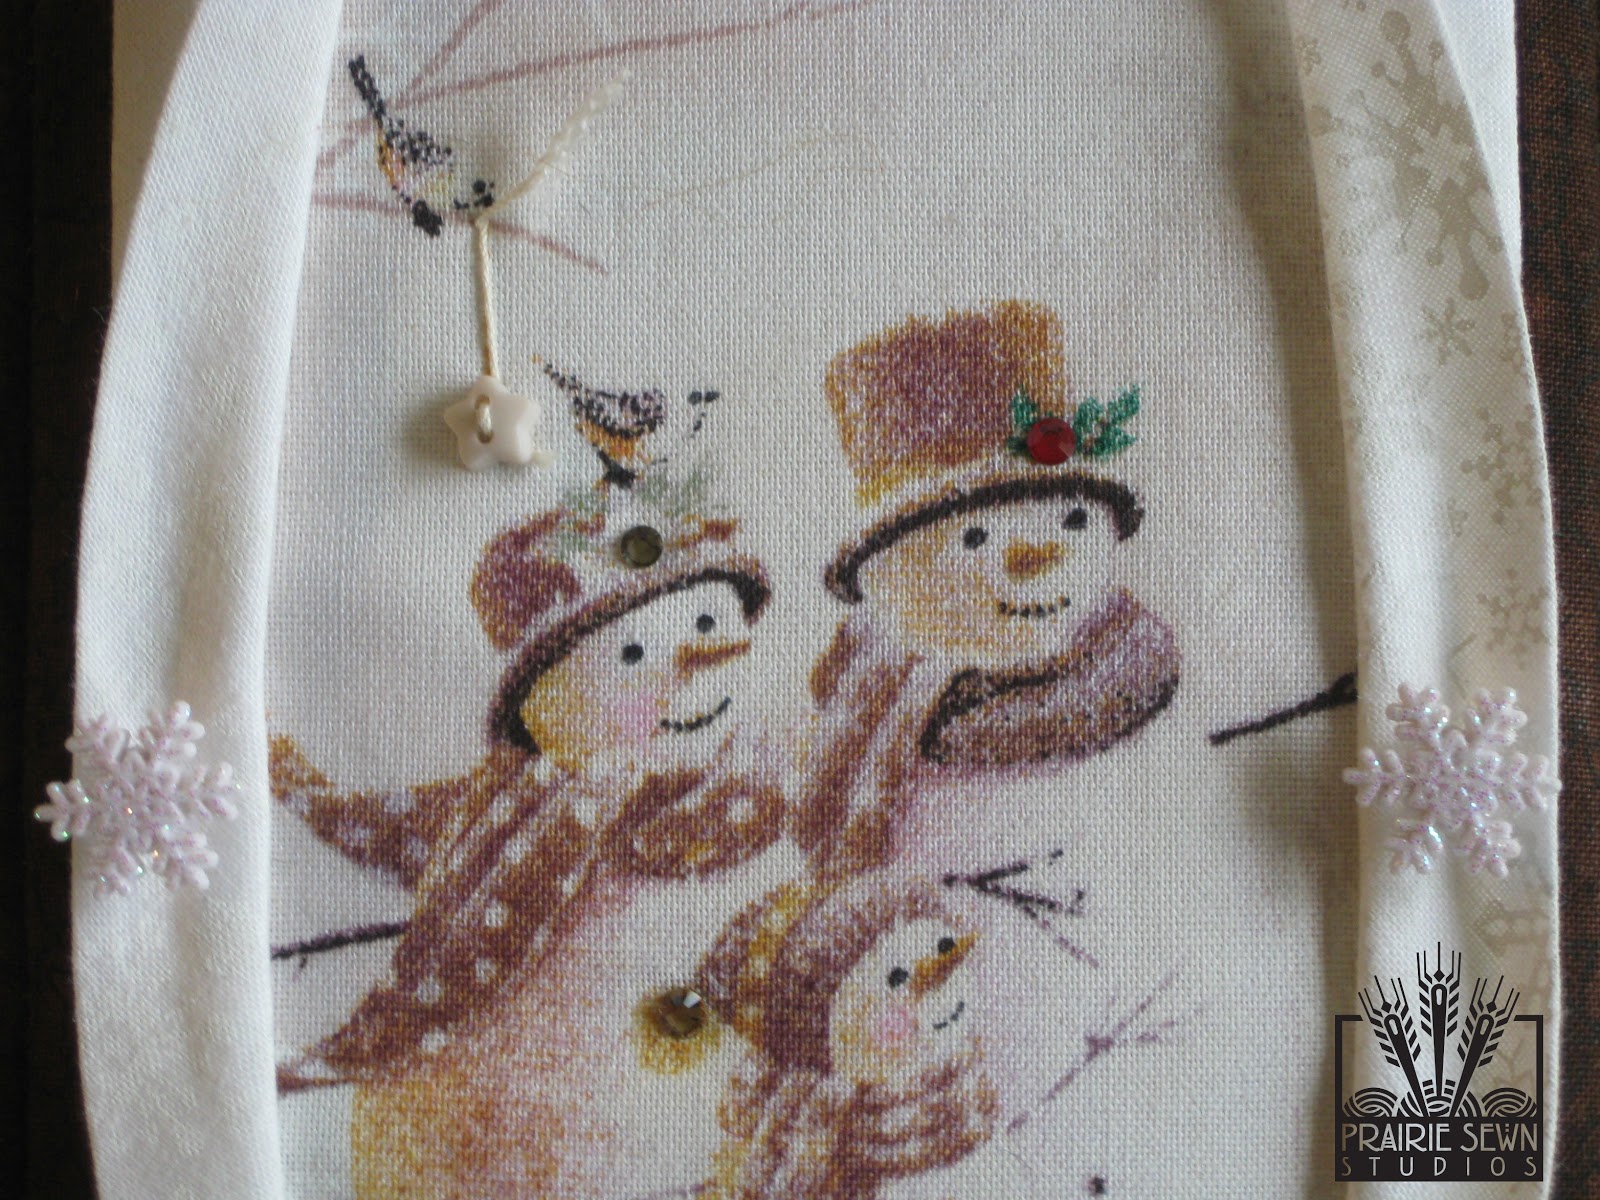
- Add embellishments as desired.
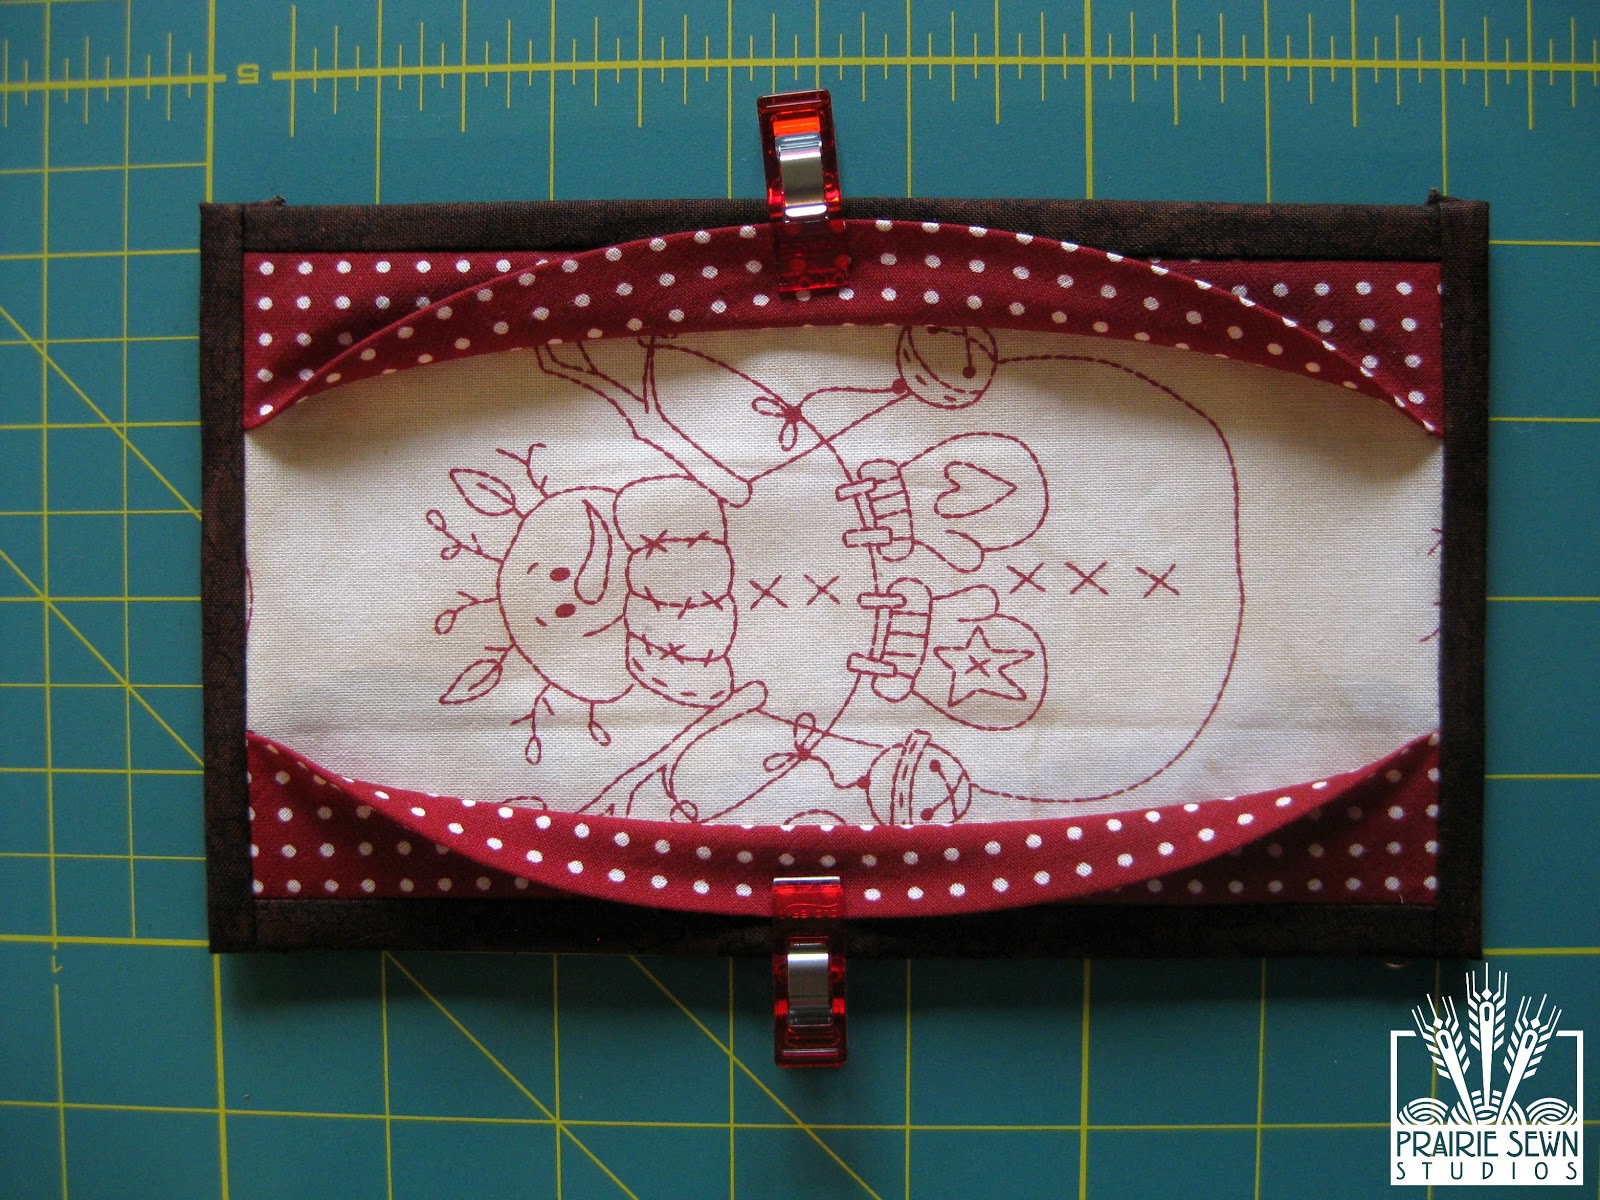
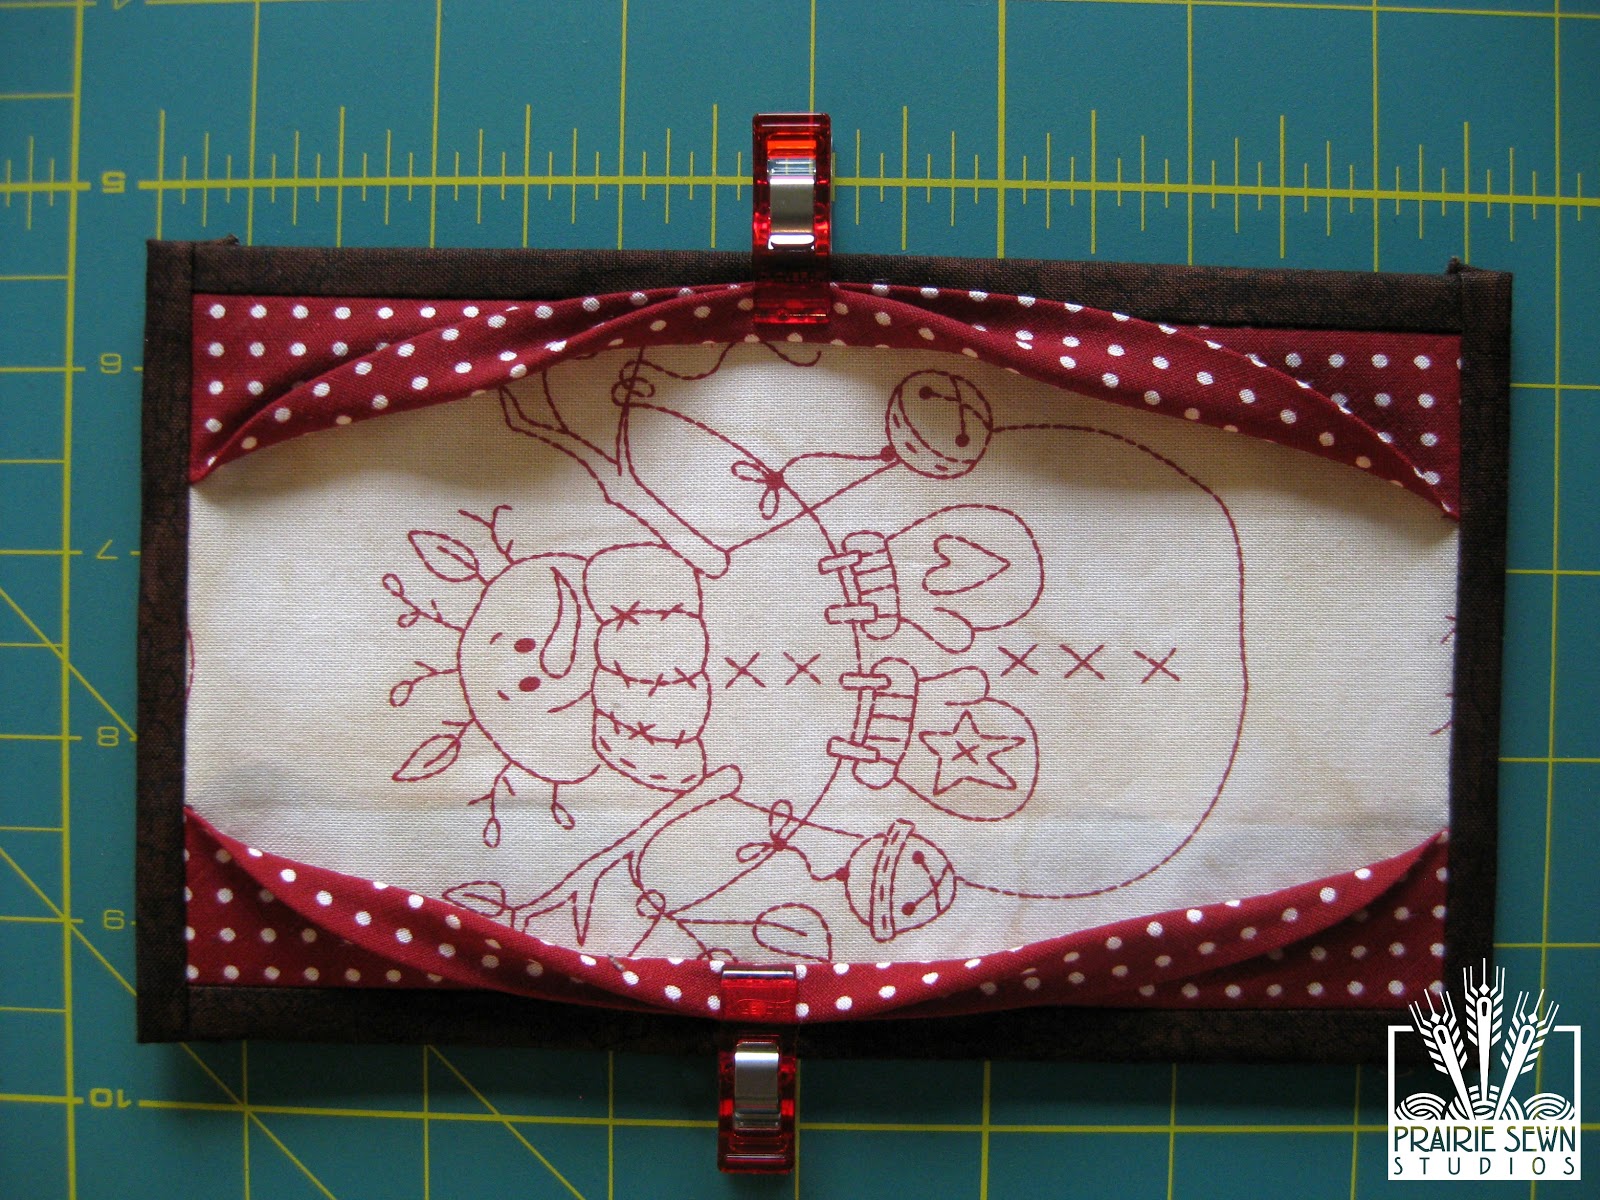
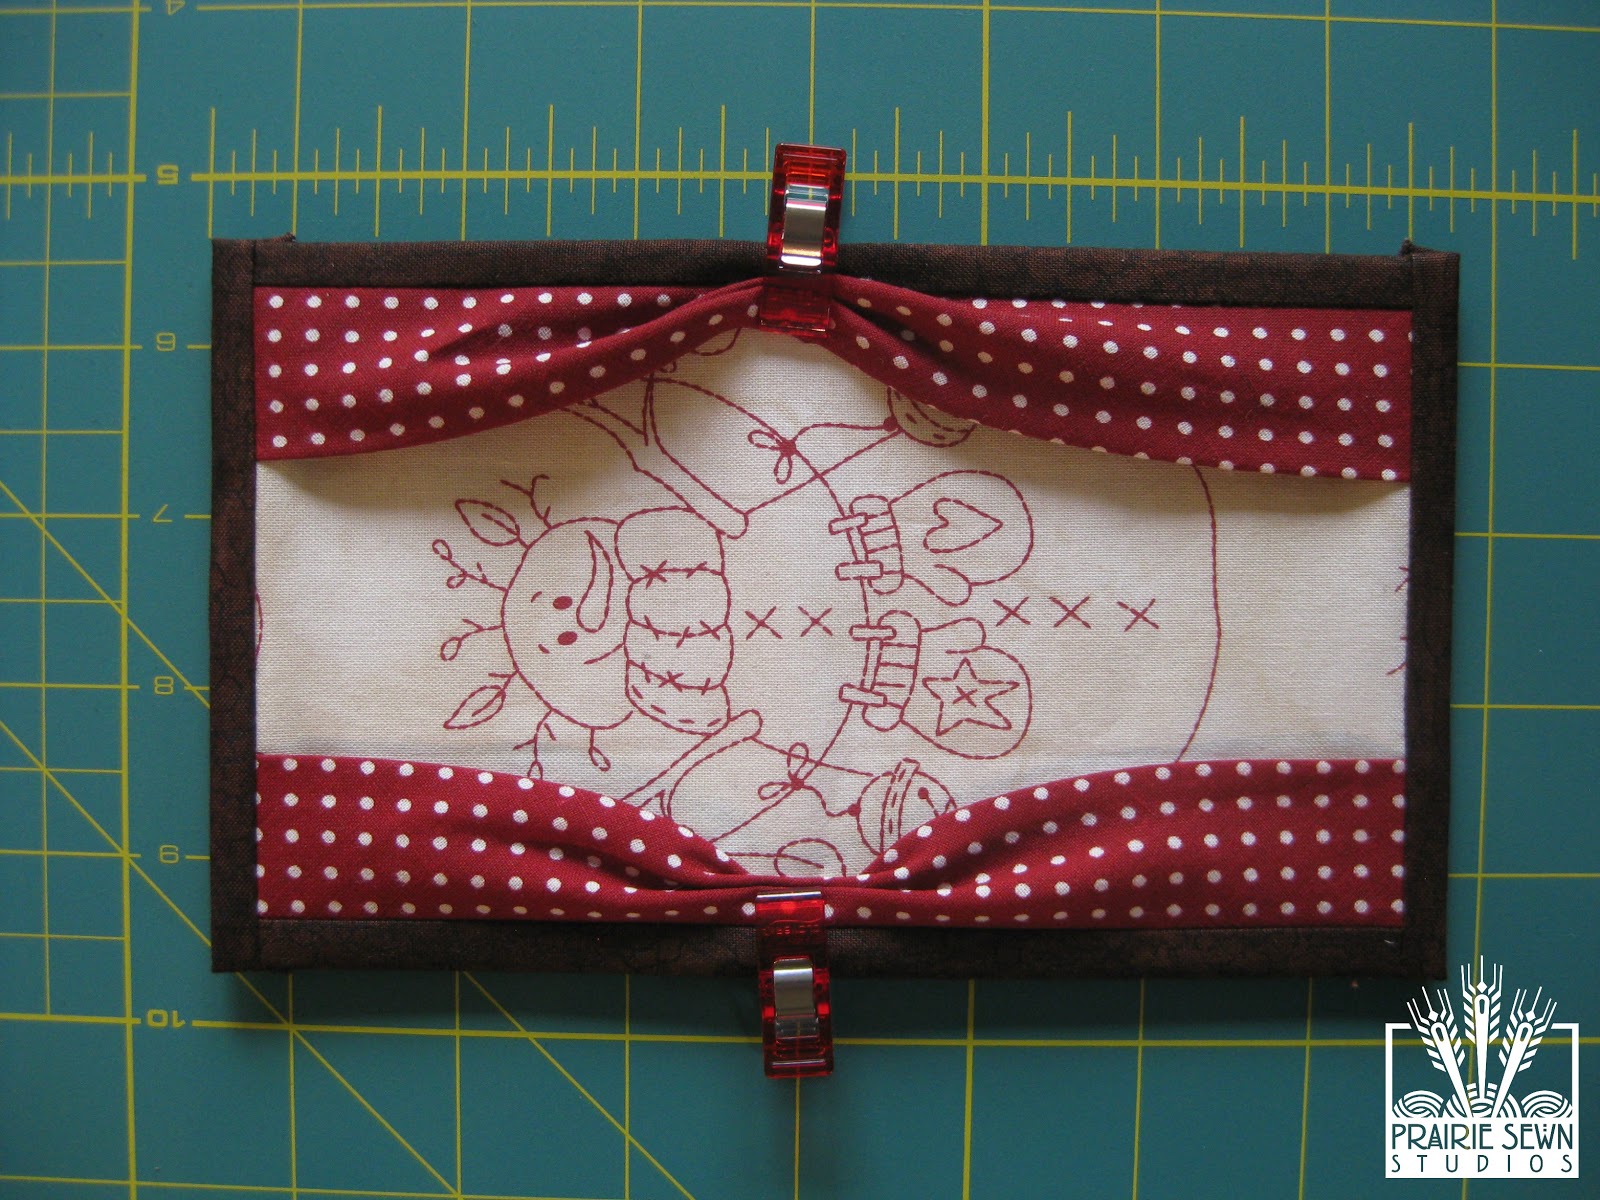
- Determine how the curtains will hang on the finished side. Tack them down or use embellishments to hold them back from the picture.
4. Sew Container together just as though it were the Cube.
Next up:


Leave a Reply